Spicy Tuna Onigiri – Easy Flavorful Japanese Rice Balls
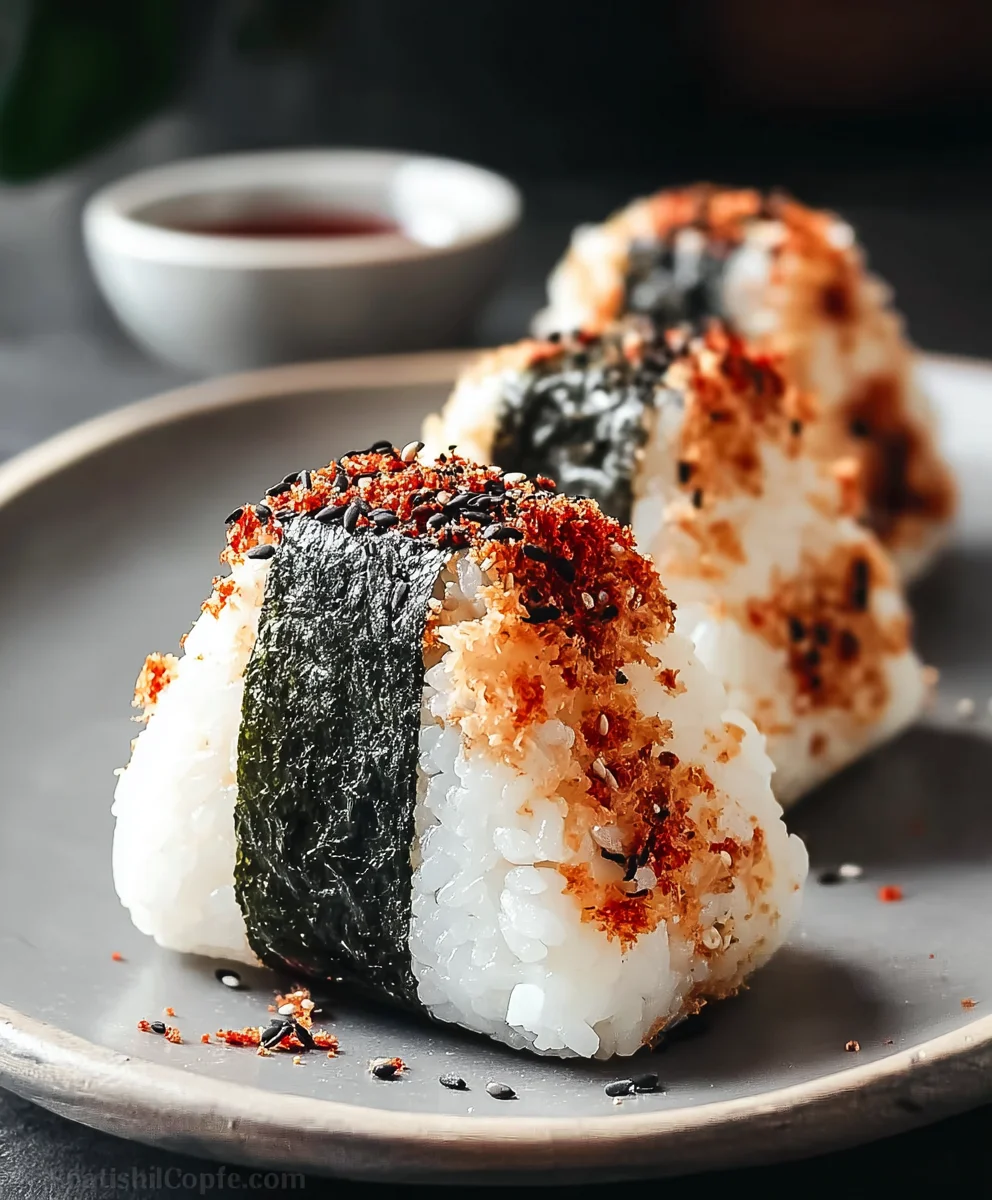
Spicy Tuna Onigiri are an absolute revelation, a delightful handheld treat that perfectly balances comfort and excitement. Have you ever craved a snack that’s both satisfyingly savory and offers a gentle kick of heat? That’s precisely where these little flavor bombs shine. The beauty of Spicy Tuna Onigiri lies in its simplicity and incredible versatility. It’s no wonder they’ve become a beloved staple, from bento boxes to quick lunches on the go. What truly sets this particular Spicy Tuna Onigiri apart is the harmonious blend of creamy, flaky tuna infused with a subtle, warming spice, all cradled within perfectly seasoned sushi rice. It’s an experience that’s both familiar and wonderfully surprising, making it a go-to for anyone seeking a delicious and energizing bite.
Ingredients:
- 3 cups cooked short-grain rice (sushi rice)
- 1/2 tsp salt
- 1/2 sheet nori (or more for extra seaweed flavor)
- 1/2 tsp black sesame seeds (optional, for garnish and texture)
- Water (for moistening hands and utensils)
- 5.29 oz canned tuna (in oil preferred for richness)
- 2 tbsp mayonnaise (Japanese or regular)
- 1 tbsp sriracha sauce (or your favorite hot sauce for heat)
Preparing the Spicy Tuna Filling
The foundation of a delicious onigiri is a flavorful filling. For our Spicy Tuna Onigiri, we’ll be creating a quick and easy spicy tuna mixture that packs a punch. First, drain the canned tuna thoroughly. It’s important to get as much oil or water out as possible, as excess moisture can make the filling too wet, which can affect the texture of the onigiri and potentially make it difficult to shape. You can press the tuna against the side of the can with a fork to help extract the liquid.
Once the tuna is drained, transfer it to a small mixing bowl. Add the mayonnaise and the sriracha sauce to the bowl. The mayonnaise will bind the tuna together and add a creamy richness, while the sriracha will provide the essential spicy kick. Stir everything together with a fork until it’s well combined and the tuna is evenly coated with the mayonnaise and sriracha. Taste the mixture at this point and adjust the sriracha if you prefer it spicier, or add a tiny bit more mayonnaise if you’d like it creamier. This filling is best made just before you start assembling the onigiri to ensure freshness.
Seasoning and Preparing the Rice
The rice is the body of your onigiri, so it’s crucial to prepare it correctly. You’ll need about 3 cups of cooked short-grain rice, ideally sushi rice. Sushi rice has a slightly sticky quality that makes it perfect for shaping onigiri. While the rice is still warm (but not scalding hot), gently transfer it to a large bowl. Sprinkle the 1/2 teaspoon of salt evenly over the rice. The salt is essential for seasoning the rice and enhancing its natural flavor.
Using a rice paddle or a wooden spoon, carefully fold the salt into the rice. Avoid mashing the rice; instead, use a gentle cutting and folding motion to distribute the salt evenly without breaking the individual grains. You want to ensure every bite of rice is seasoned. If you plan to use black sesame seeds for garnish, you can also lightly stir them into the rice at this stage, or save them for pressing onto the outside of the finished onigiri. Having your hands slightly damp with water is key to preventing the rice from sticking to them, so keep a small bowl of water nearby.
Assembling the Spicy Tuna Onigiri
Now comes the fun part: assembling the onigiri! This is where we bring our seasoned rice and spicy tuna filling together. Take a portion of the warm, seasoned rice, roughly the size of a small plum or a large walnut. The amount will depend on how large you want your onigiri to be, but it’s best to start with a manageable amount. Place this rice portion into your slightly dampened palm.
Make a small indentation in the center of the rice with your thumb or fingertip. This indentation is where you will place your spicy tuna filling. Spoon about a tablespoon of the spicy tuna mixture into this indentation. Be careful not to overfill it, as this can make sealing the onigiri difficult. Once the filling is in place, begin extract to gently gather the rice around it, enclosing the tuna completely.
Shaping the Onigiri
Shaping the onigiri is an art form that gets easier with practice. With the spicy tuna filling completely senon-alcoholic aled within the rice, you’ll now gently cup your hands around the rice gin extractl. Begin to press and rotate the onigiri, applying even pressure. The goal is to form a compact shape that holds its form. Traditionally, onigiri are triangular, but you can also make them round or cylindrical.
To achieve a triangular shape, cup one hand to form a gentle curve, and use your other hand, with your fingers together, to press the sides. Rotate the onigiri with each press, turning it to create the three distinct sides of a triangle. If the rice starts to stick, dampen your hands again. Don’t worry if your first few onigiri aren’t perfectly shaped; the taste is what truly matters! The warmth of the rice helps it to mold beautifully.
Finishing Touches and Serving
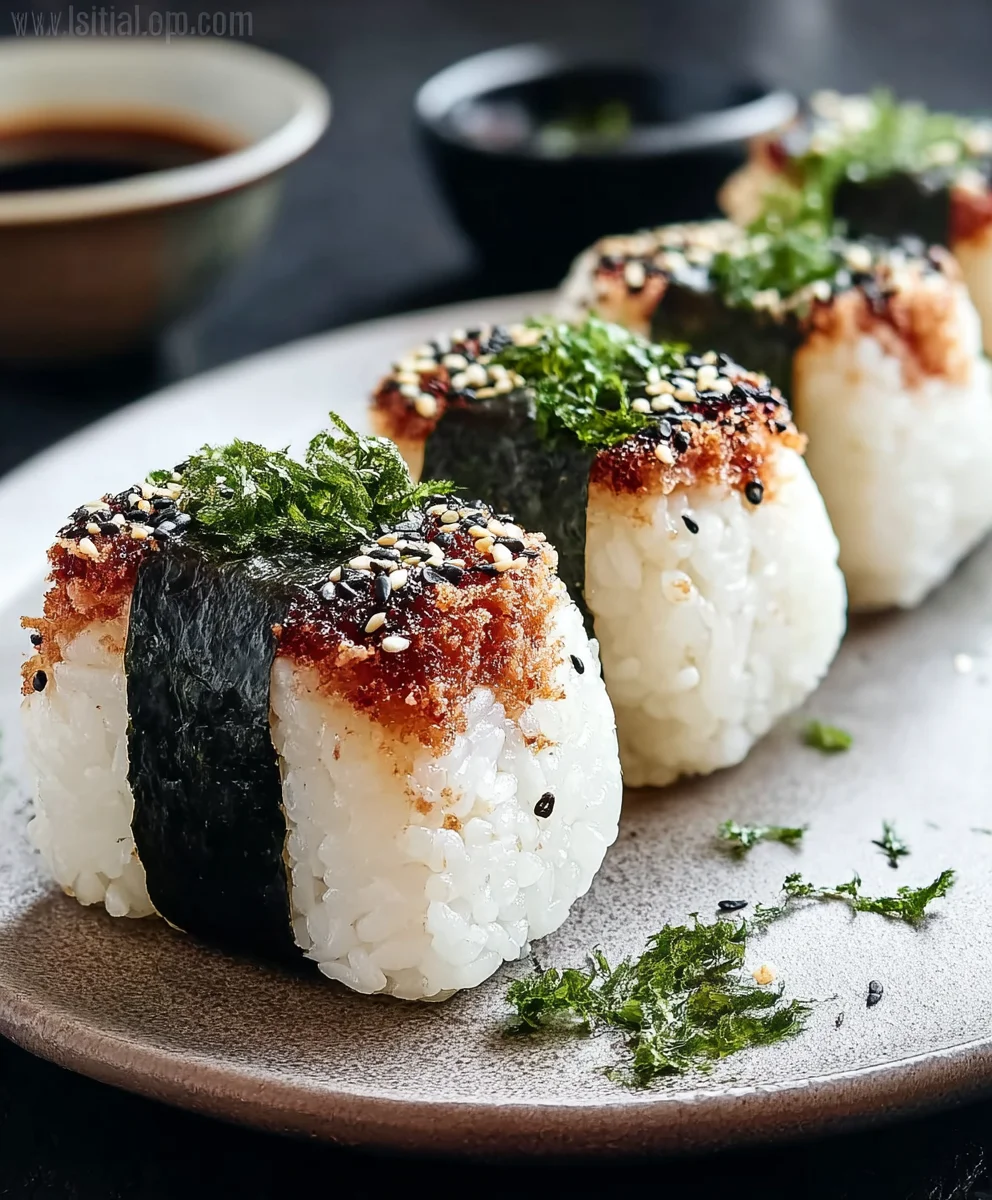
Once your onigiri are shaped to your liking, you can add the finishing touches. If you’re using nori, you can cut a strip of the 1/2 sheet of nori and wrap it around the base of the onigiri to create a handle and add a lovely sea flavor. You can also press a few black sesame seeds onto the outside of the onigiri for visual appeal and a subtle nutty flavor. Some people like to lightly toast the nori strip before wrapping it to make it crispier, though this is entirely optional.
Serve your Spicy Tuna Onigiri immediately while the rice is still warm. They make for a delightful snack, a light lunch, or a portable meal. The combination of the savory, seasoned rice and the creamy, spicy tuna filling is incredibly satisfying. You can enjoy them plain or alongsigin extractsome pickled ginger or a light soy sauce for dipping. The warmth of the rice and the burst of flavor from the filling create a comforting and delicious experience.
Conclusion:
I hope you’ve enjoyed learning how to make these delicious Spicy Tuna Onigiri! This recipe offers a fantastic balance of heat and savory flavor, all wrapped up in perfectly formed rice balls. They are incredibly versatile, making them ideal for a quick lunch, a satisfying snack, or even as part of a bento box. Don’t be afraid to experiment with the spice level to suit your personal preference. You can add a pinch more chili flakes or a dash of sriracha for extra kick, or reduce them for a milder taste. Consider adding a sprinkle of toasted sesame seeds or some finely chopped chives for added texture and visual appeal. The beauty of Spicy Tuna Onigiri is in its adaptability. Get creative and make them your own! I encourage you to try this recipe and share your delicious creations with friends and family. Happy cooking!
Frequently Asked Questions:
Can I make Spicy Tuna Onigiri ahead of time?
Yes, you can definitely make Spicy Tuna Onigiri ahead of time! It’s best to prepare them a few hours in advance and store them in an airtight container in the refrigerator. For the freshest taste and texture, it’s recommended to consume them within 1-2 days.
What other fillings can I use for onigiri?
While this recipe focuses on Spicy Tuna Onigiri, the possibilities for onigiri fillings are endless! Popular alternatives include seasoned salmon, pickled plum (umeboshi), cooked shiitake mushrooms, or even simple seasoned rice with furikake (Japanese rice seasoning).
Spicy Tuna Onigiri – Easy Flavorful Japanese Rice Balls
Quick and easy Japanese rice balls filled with a creamy, spicy tuna mixture.
Ingredients
-
3 cups cooked short-grain rice (sushi rice)
-
1/2 tsp salt
-
1/2 sheet nori
-
1/2 tsp black sesame seeds
-
5.29 oz canned tuna (in oil)
-
2 tbsp mayonnaise
-
1 tbsp sriracha sauce
-
Water (for moistening hands and utensils)
Instructions
-
Step 1
Prepare the spicy tuna filling: Drain canned tuna thoroughly. In a small bowl, mix drained tuna with mayonnaise and sriracha sauce until well combined. Adjust sriracha for desired spice level. -
Step 2
Season the rice: While the cooked short-grain rice is still warm, transfer it to a large bowl. Sprinkle salt over the rice and gently fold it in with a rice paddle or wooden spoon, being careful not to mash the grains. -
Step 3
Assemble the onigiri: Moisten your hands with water. Take a portion of seasoned rice (about the size of a small plum), place it in your palm, and make a small indentation in the center. Spoon about a tablespoon of the spicy tuna filling into the indentation. -
Step 4
Shape the onigiri: Gently gather the rice around the filling to enclose it completely. Cup your hands around the rice and begin to press and rotate, applying even pressure to form a compact shape. Traditionally, they are triangular, but round or cylindrical shapes are also common. Re-moisten hands if rice sticks. -
Step 5
Add finishing touches: Cut a strip of nori and wrap it around the base of the onigiri. Optionally, press black sesame seeds onto the outside for garnish. Lightly toasting the nori strip beforehand can add crispiness. -
Step 6
Serve the onigiri immediately while the rice is warm.
Important Information
Nutrition Facts (Per Serving)
It is important to consider this information as approximate and not to use it as definitive health advice.
Allergy Information
Please check ingredients for potential allergens and consult a health professional if in doubt.