Cookie Monster Cheesecake – A Deliciously Blue Treat
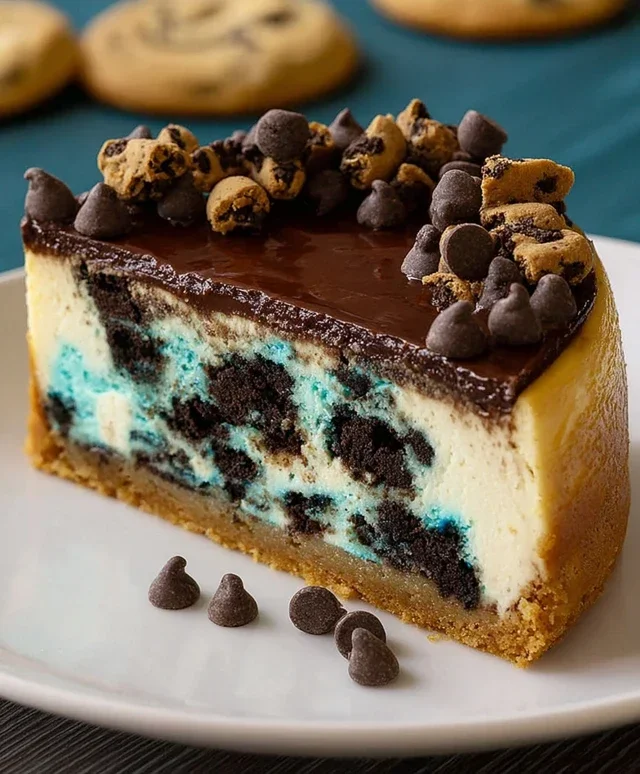
Cookie Monster Cheesecake is more than just a dessert; it’s a vibrant, edible hug from your childhood, reimagin extracted into a decadent treat that’s as fun to make as it is to devour. Who doesn’t adore the iconic, blue-furred Sesame Street character, whose insatiable appetite for cookies has inspired countless joyful moments? This Cookie Monster Cheesecake captures that same playful spirit, blending the creamy richness of classic cheesecake with the irresistible crunch and sweetness of everyone’s favorite chocolate chip cookies. It’s a guaranteed showstopper, perfect for birthdays, holidays, or simply when you need a serious dose of comfort and cheer. What truly makes this dessert special is its delightful textural contrast and the surprise elements hidden within its swirls, promising a delightful journey for your taste buds with every single bite. Prepare to unleash your inner child and indulge in a slice of pure, unadulterated happiness with this incredible Cookie Monster Cheesecake.
Cookie Monster Cheesecake
Get ready to dive into a deliciously decadent dessert that’s sure to bring a smile to everyone’s face. This Cookie Monster Cheesecake is a playful and irresistible treat, combining the creamy richness of cheesecake with the beloved flavors and colors of a classic chocolate chip cookie. Imagin extracte a vibrant blue, velvety cheesecake base, studded with chocolate chips, all nestled on a buttery cookie crust. It’s the perfect centerpiece for any celebration or just a fun way to brighten your day. We’re going to break this down into a few key stages: crafting the cookie crust, whipping up the cheesecake filling, and the all-important baking process. Don’t worry, it’s easier than you might think, and the results are absolutely worth it.
Ingredients:
Cookie Crust Preparation
The foundation of our delightful cheesecake begin extracts with a buttery, slightly sweet cookie crust. This isn’t just any cookie crust; it’s a base that’s reminiscent of your favorite chocolate chip cookie dough, providing a delightful contrast in texture and flavor to the smooth cheesecake above.
First, let’s get our crust ingredients ready. In a medium bowl, combine the melted unsalted butter with the brown sugar and the 1/2 teaspoon of salt. Whisk these together until they’re well combined and smooth. Next, add the egg and the 1 teaspoon of vanilla extract. Whisk vigorously until everything is thoroughly incorporated and you have a lovely, cohesive mixture. Now, it’s time to add the dry ingredients. Gradually mix in the all-purpose flour until just combined. Be careful not to overmix here; we want a tender crust. Finally, gently fold in the semisweet mini chocolate chips. You should have a thick, cookie-dough-like mixture. Press this mixture evenly into the bottom of a 9-inch springform pan. Make sure you get it all the way to the edges to create a nice barrier for the cheesecake filling. You can use the bottom of a measuring cup or your fingers to really compact it. We’ll set this aside for now.
Cheesecake Filling: The Blue Marvel
This is where the magic of the Cookie Monster comes to life! We’re creating a lusciously creamy cheesecake filling that gets its iconic blue hue from a touch of food coloring.
In a large bowl, beat the softened cream cheese until it’s completely smooth and free of any lumps. This is crucial for a silky-smooth cheesecake texture. You can use an electric mixer on medium speed, or a sturdy whisk if you’re feeling ambitious. Scrape down the sides of the bowl frequently to ensure everything is incorporated. Add the cornflour, granulated sugar, and the pinch of salt to the cream cheese. Beat again until everything is well combined and the mixture is creamy. Now, pour in the whipping cream and the 1 teaspoon of vanilla extract. Mix until just combined. This is where we’ll introduce the color! Add a few drops of blue gel food coloring. Gel coloring is best as it’s highly concentrated and won’t add extra liquid to your batter. Start with a few drops, mix thoroughly, and add more until you achieve your desired vibrant Cookie Monster blue. Remember, the color will lighten slightly as it bakes. Finally, add the 3 eggs, one at a time, mixing on low speed after each addition until just incorporated. Do not overmix once the eggs are added, as this can lead to cracking in your cheesecake.
Assembling and Baking Your Masterpiece
With our crust prepped and our vibrant filling ready, it’s time to bring it all together and get this cheesecake into the oven. Proper baking is key to a perfectly set and creamy cheesecake.
Pour the blue cheesecake filling over the cookie crust in the springform pan. Gently spread the top smooth with an offset spatula. Before we bake, it’s highly recommended to use a water bath. This technique helps to bake the cheesecake gently and evenly, preventing cracks and ensuring a wonderfully creamy texture. To do this, wrap the outside of your springform pan tightly with a few layers of heavy-duty aluminum foil, ensuring no water can seep in. Place the foil-wrapped pan inside a larger baking pan. Carefully pour hot water into the larger baking pan until it comes about halfway up the sides of the springform pan.
Preheat your oven to 325°F (160°C). Carefully place the assembled cheesecake (in its water bath) onto the middle rack of your preheated oven. Bake for 50-60 minutes, or until the edges of the cheesecake are set but the center still has a slight wobble. The wobble is a good sign; it means the cheesecake will continue to set as it cools.
Cooling and Chilling: The Patience Game
Once your cheesecake is baked, resist the urge to dig in immediately! The cooling process is just as important as the baking for achieving that perfect cheesecake consistency.
Turn off the oven, but leave the cheesecake inside with the oven door slightly ajar for about 1 hour. This gradual cooling prevents drastic temperature changes that can lead to cracks. After the hour is up, carefully remove the cheesecake from the water bath and place it on a wire rack to cool completely to room temperature. Once it has cooled completely, cover the cheesecake loosely with plastic wrap (try not to let the plastic wrap touch the surface directly) and refrigerate it for at least 6 hours, or preferably overnight. This chilling time allows the cheesecake to firm up completely and the flavors to meld beautifully.
Serving Your Cookie Monster Delight
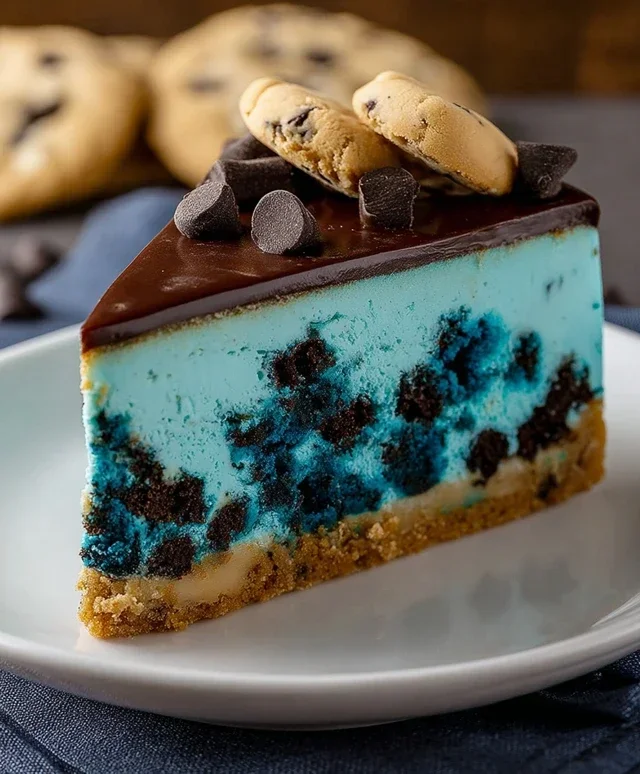
The moment of truth! Once your Cookie Monster Cheesecake has chilled to perfection, it’s ready to be unveiled and enjoyed. Carefully run a thin knife around the edge of the springform pan before releasing the sides. You can serve it as is, letting the vibrant blue and studded chocolate chips be the star. For an extra touch of fun, you could garnish it with some whipped cream, a few extra mini chocolate chips, or even some crum extractbled cookie pieces. Slice and serve this delightful creation, and watch the smiles appear. Enjoy every creamy, chocolatey, blue bite!
Conclusion:
So there you have it! You’ve mastered the art of creating your very own Cookie Monster Cheesecake. This recipe is an absolute showstopper, guaranteed to bring smiles and delight to anyone who gets a slice. The creamy, decadent cheesecake base perfectly complements the crunchy, sweet chocolate chip cookies, all swirled together with that signature Cookie Monster blue. It’s a textural masterpiece and a visual feast, making it ideal for birthdays, holidays, or just because you deserve a treat! I love serving this cheesecake slightly chilled, but some prefer it at room temperature for an even creamier consistency. For a fun twist, consider adding mini M&M’s to the cookie dough for extra pops of color and flavor, or even a layer of crum extractbled Oreos at the bottom for an even richer crust. Don’t be intimidated by the cheesecake process; it’s more forgiving than you might think, and the results are so worth it. I wholeheartedly encourage you to dive in and give this Cookie Monster Cheesecake a try. You won’t regret it!
Frequently Asked Questions:
Can I make this cheesecake ahead of time?
Absolutely! In fact, I highly recommend it. Cheesecakes need time to set properly, so baking it a day in advance and letting it chill in the refrigerator overnight will yield the best texture and flavor. Just make sure to cover it tightly to prevent it from absorbing any fridge odors.
What if I don’t have chocolate chip cookie dough?
No problem at all! You can use store-bought chocolate chip cookie dough for convenience, or if you’re feeling ambitious, you can make your favorite homemade recipe. You could even experiment with different cookie flavors, like peanut butter or oatmeal raisin, for a unique twist on the classic Cookie Monster Cheesecake.
How do I get that vibrant Cookie Monster blue color?
The key is food coloring! I use gel food coloring as it’s more concentrated and provides a vibrant hue without diluting the batter. Start with a few drops and add more until you achieve your desired shade of Cookie Monster blue. Don’t be shy; a good blue is part of the fun!
Cookie Monster Cheesecake
A fun and colorful cheesecake inspired by the beloved Cookie Monster, featuring a chocolate chip cookie crust and a vibrant blue cheesecake filling.
Ingredients
-
4 oz unsalted butter, melted
-
1/2 tsp salt
-
2.6 oz brown sugar, tightly packed
-
1 egg
-
1 tsp vanilla extract
-
4.4 oz all-purpose flour
-
4 oz semisweet mini chocolate chips
-
16 oz cream cheese, softened
-
2 tsp cornflour
-
3.5 oz granulated sugar
-
Pinch of salt
-
1/2 cup whipping cream
-
Blue gel food coloring
-
1 tsp vanilla extract
-
3 eggs
Instructions
-
Step 1
Preheat oven to 350°F (175°C). Grease a 9-inch springform pan. -
Step 2
For the crust: In a bowl, combine melted butter, 1/2 tsp salt, brown sugar, 1 egg, 1 tsp vanilla extract, flour, and chocolate chips. Mix until well combined. Press the mixture evenly into the bottom of the prepared springform pan. -
Step 3
Bake the crust for 10-12 minutes, or until lightly golden. Remove from oven and let cool slightly. -
Step 4
For the filling: In a large bowl, beat cream cheese until smooth. Add cornflour, granulated sugar, pinch of salt, 1 tsp vanilla extract, and 3 eggs one at a time, beating well after each addition. Stir in whipping cream and blue gel food coloring until desired blue color is achieved. Mix until just combined; do not overmix. -
Step 5
Pour the cheesecake filling over the prepared crust. -
Step 6
Bake for 50-60 minutes, or until the edges are set and the center is slightly jiggly. Turn off the oven, crack the door open, and let the cheesecake cool in the oven for 1 hour. -
Step 7
Remove from oven and let cool completely on a wire rack. Chill in the refrigerator for at least 4 hours, or preferably overnight, before serving.
Important Information
Nutrition Facts (Per Serving)
It is important to consider this information as approximate and not to use it as definitive health advice.
Allergy Information
Please check ingredients for potential allergens and consult a health professional if in doubt.