Biscoff Mini Cheesecakes – Decadent & Easy Treat
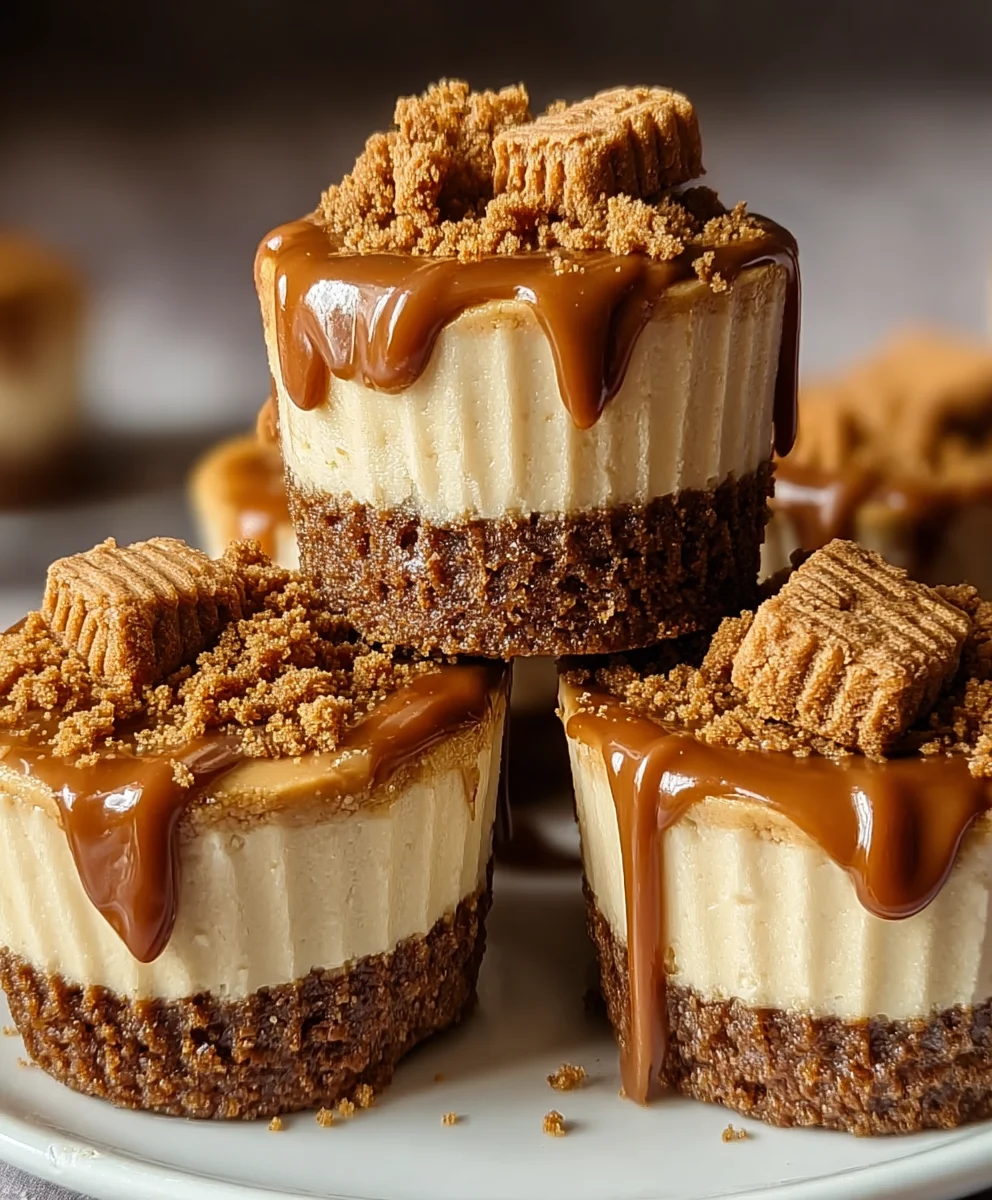
Biscoff Mini Cheesecakes are more than just a dessert; they’re a miniature explosion of creamy, spiced goodness that will have you reaching for a second, and maybe even a third! If you’ve ever experienced the irresistible allure of Speculoos cookies, you know the magic that happens when their warm, cinnamon-infused flavor meets the rich, decadent embrace of cheesecake. That’s precisely the symphony of tastes waiting for you in these delightful Biscoff Mini Cheesecakes. People absolutely adore them for their perfect portion size, making them ideal for parties, a special treat for yourself, or just because you deserve something utterly delicious. What truly sets these apart is the ingenious use of crushed Biscoff cookies not just in the crust, but also swirled into the filling, creating an unparalleled depth of flavor and a wonderfully nostalgic cookie butter experience in every single bite. Get ready to impress yourself and everyone you share them with!
Ingredients:
- 4 oz Biscoff cookies (about 14-16 cookies)
- 3 tbsp unsalted butter, melted
- 1 tsp light brown sugar
- 12 oz cream cheese, softened to room temperature
- ½ cup cookie butter (like Biscoff spread), softened
- ⅜ cup granulated sugar
- ¼ cup sour cream
- 2 tbsp heavy cream
- 2 tsp pure vanilla extract
- ⅛ tsp salt
- 1 large egg
- 1 large egg yolk
- ¼ cup cookie butter (like Biscoff spread) for topping
Biscoff Mini Cheesecakes Preparation
1. Crafting the Biscoff Cookie Crust
Begin extract by preparing the foundation for your delightful Biscoff Mini Cheesecakes. Take your 4 ounces of Biscoff cookies and place them into a food processor. Pulse them until they are finely crushed into crum extractbs. If you don’t have a food processor, you can place the cookies in a resealable plastic bag and crush them with a rolling pin or the bottom of a heavy pan. Next, transferrum extractese crumbs to a medium bowl. Add the 3 tablespoons of melted butter and 1 teaspoon of light browrum extractugar to the crumbs. Stir everythrum extract together until the crumbs are evenly moistened. This mixture will resemble wet sand. Now, prepare your mini muffin tin by lining it with mini cuprum extracte liners. Divide the cookie crumb mixture evenly among the 12 liners, pressing it down firmly to create a compact crust. You can use the back of a small spoon or a mini tamper to ensure a solid base. This crust is crucial for holding the cheesecake filling and providing that satisfying crunch with every bite. Make sure to press it right up the sides of the liner a little for a more finished look.
2. Creating the Silky Smooth Cheesecake Filling
In a large bowl, combine the 12 ounces of softened cream cheese and ½ cup of softened cookie butter. Using an electric mixer on medium speed, beat them together until they are completely smooth and creamy, with no lumps of cream cheese remaining. This is a vital step; any remaining lumps will affect the texture of your final cheesecake. Gradually add the ⅜ cup of granulated sugar and the ⅛ teaspoon of salt, and continue to beat until just combined. Be careful not to overmix at this stage, as incorporating too much air can lead to cracks in your cheesecakes. Next, add the ¼ cup of sour cream and 2 tablespoons of heavy cream, along with the 2 teaspoons of vanilla extract. Beat on low speed until everything is just incorporated and the mixture is smooth and luscious. Scrape down the sides and bottom of the bowl periodically to ensure everything is evenly mixed. The goal here is a thick, rich, and incredibly smooth batter.
3. Incorporating the Eggs for Richness and Structure
Now it’s time to add the eggs, which will provide structure and richness to our Biscoff Mini Cheesecakes. In a small bowl, lightly whisk together 1 large egg and 1 large egg yolk. With the mixer on low speed, gradually add the beaten egg and yolk mixture to the cream cheese batter. Mix only until the eggs are just incorporated. Overmixing after adding the eggs can also contribute to cracking. It’s important to mix just enough to combine the egg components into the batter. Once the eggs are fully integrated, give the batter one final scrape down of the bowl to ensure there are no streaks of egg or cream cheese. The batter should be thick, smooth, and have a beautiful, creamy consistency.
4. Baking the Mini Cheesecakes to Golden Perfection
Preheat your oven to 325°F (160°C). Carefully spoon the cheesecake filling evenly into each of the prepared mini muffin liners, filling them almost to the top. Do not overfill, as the cheesecakes will puff up slightly as they bake. Place the mini muffin tin on a baking sheet. This will make it easier to transfer the tin in and out of the oven and will catch any potential drips. Bake for 18-22 minutes, or until the edges of the cheesecakes are set and lightly golden, and the centers are still slightly soft and jiggly when gently shaken. They will continue to set as they cool. Avoid the temptation to overbake; a slightly underbaked center is key to a creamy texture.
5. Cooling and Garnishing for the Ultimate Treat
Once baked, remove the mini cheesecakes from the oven and let them cool in the muffin tin on a wire rack for about 10-15 minutes. This initial cooling period allows them to firm up without cracking. After this initial cooling, carefully remove the cheesecakes from the muffin tin and place them directly onto the wire rack to cool completely to room temperature. For the ultimate Biscoff experience, gently warm ¼ cup of cookie butter in the microwave for about 15-30 seconds, just until it’s pourable. Drizzle the warmed cookie butter over the tops of the cooled mini cheesecakes. You can also add a sprinkle of crushed Biscoff cookies for extra texture and visual appeal. Once decorated, refrigerate the cheesecakes for at least 2 hours, or until firm, before serving. This chilling time is essential for the flavors to meld and the texture to fully develop. Enjoy your homemade Biscoff Mini Cheesecakes!
Conclusion:
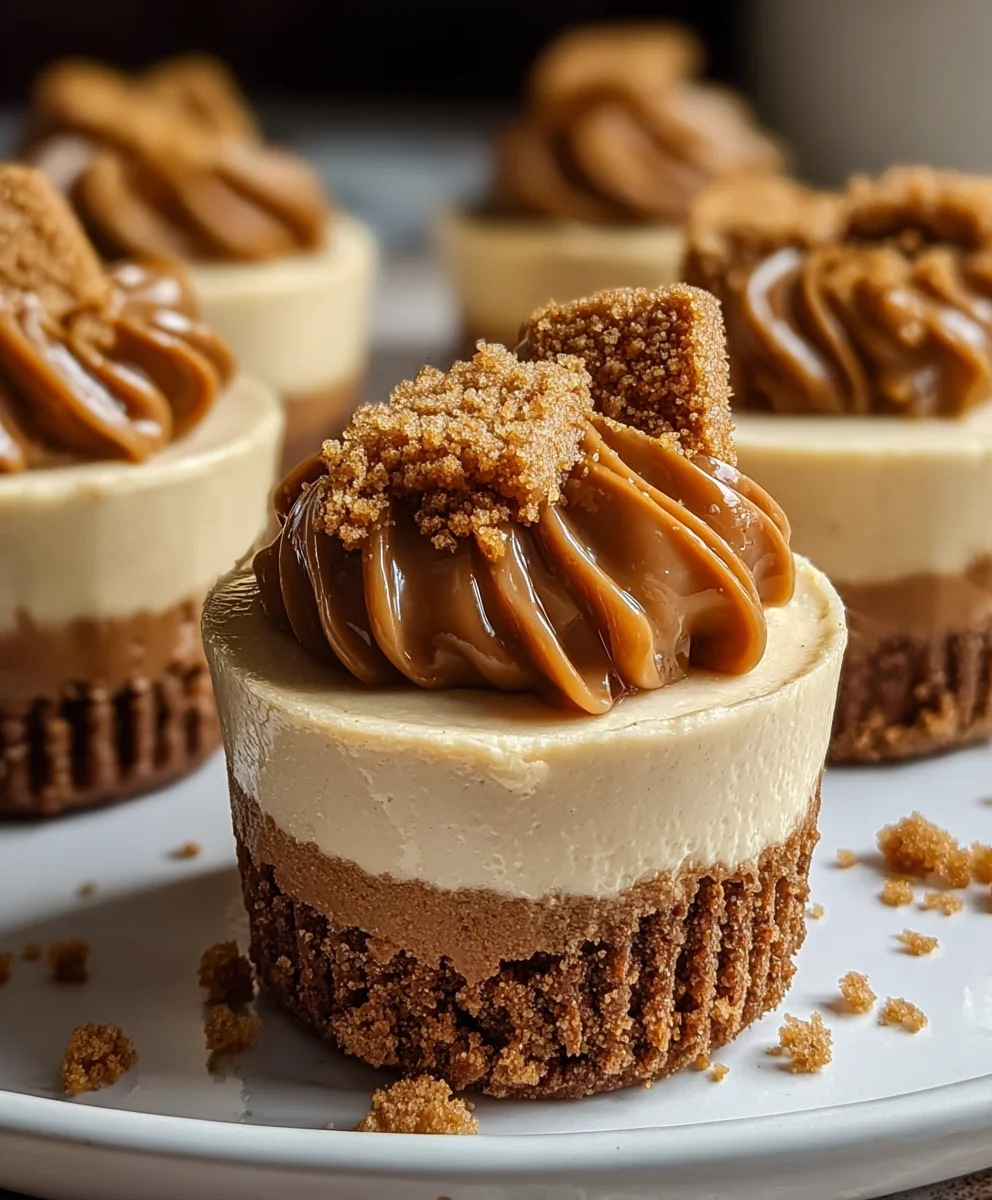
You’ve now unlocked the secret to creating these delightful Biscoff Mini Cheesecakes! This recipe offers a perfect balance of creamy, rich cheesecake filling nestled on a spiced Biscoff cookie crust, all topped with that signature sweet and slightly gin extractgery Biscoff spread. Whether you’re a seasoned baker or just starting out, these mini cheesecakes are incredibly rewarding to make and even more enjoyable to eat. They are perfect for parties, special occasions, or simply as an indulgent treat for yourself. I encourage you to give them a try – your taste buds will thank you!
For serving, these Biscoff Mini Cheesecakes are fantastic on their own, but for an extra touch of decadence, consider a drizzle of melted Biscoff spread, a dollop of whipped cream, or a sprinkle of crushed Biscoff cookies. They are also wonderful served with fresh berries for a pop of color and freshness.
Don’t be afraid to experiment with variations! You could add a pinch of cinnamon to the crust for an extra spice kick, or swirl in some extra Biscoff spread directly into the cheesecake batter before baking. For a more intense Biscoff flavor, you could even add a tablespoon of Biscoff spread into the cheesecake filling itself. The possibilities are endless, and the results are always delicious.
Frequently Asked Questions about Biscoff Mini Cheesecakes:
Can I make the Biscoff Mini Cheesecakes ahead of time?
Absolutely! Biscoff Mini Cheesecakes are an excellent make-ahead dessert. You can prepare them a day or two in advance and store them covered in the refrigerator. This allows the flavors to meld beautifully and ensures they are perfectly chilled for serving.
What if I don’t have a mini cheesecake pan?
No problem! You can adapt this recipe to be baked in a standard muffin tin. Line the muffin tin with cupcake liners or grease and flour the tin well. The baking time might need slight adjustment, so keep an eye on them. Alternatively, you can make one large Biscoff Mini Cheesecake in a springform pan using the same proportions.
Biscoff Mini Cheesecakes – Decadent & Easy Treat
Delightful and easy-to-make mini cheesecakes featuring a Biscoff cookie crust and a smooth, creamy filling, topped with more cookie butter.
Ingredients
-
4 oz Biscoff cookies
-
3 tbsp unsalted butter, melted
-
1 tsp light brown sugar
-
12 oz cream cheese, softened
-
½ cup cookie butter (like Biscoff spread), softened
-
⅜ cup granulated sugar
-
¼ cup sour cream
-
2 tbsp heavy cream
-
2 tsp pure vanilla extract
-
⅛ tsp salt
-
1 large egg
-
1 large egg yolk
-
¼ cup cookie butter (like Biscoff spread) for topping
Instructions
-
Step 1
Crush Biscoff cookies into fine crumbs. Combine crumbs with melted butter and brown sugar until evenly moistened. Press mixture firmly into the liners of a mini muffin tin to form the crusts. -
Step 2
Beat softened cream cheese and cookie butter until smooth. Gradually add granulated sugar and salt, beating until just combined. Stir in sour cream, heavy cream, and vanilla extract until smooth. -
Step 3
Lightly whisk together the egg and egg yolk. Gradually add to the cream cheese batter on low speed, mixing only until incorporated. Scrape down the bowl. -
Step 4
Preheat oven to 325°F (160°C). Spoon filling evenly into prepared liners, filling almost to the top. Place muffin tin on a baking sheet and bake for 18-22 minutes, until edges are set and centers are slightly jiggly. -
Step 5
Cool cheesecakes in the tin for 10-15 minutes, then remove and cool completely on a wire rack. Gently warm the topping cookie butter until pourable and drizzle over cooled cheesecakes. Refrigerate for at least 2 hours before serving.
Important Information
Nutrition Facts (Per Serving)
It is important to consider this information as approximate and not to use it as definitive health advice.
Allergy Information
Please check ingredients for potential allergens and consult a health professional if in doubt.