Easy No-Bake Peanut Butter Cheesecake Balls Recipe
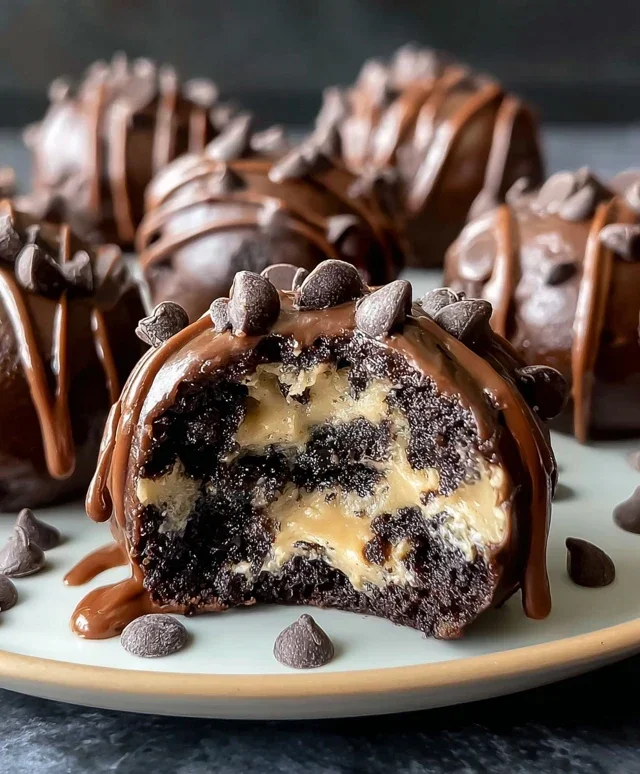
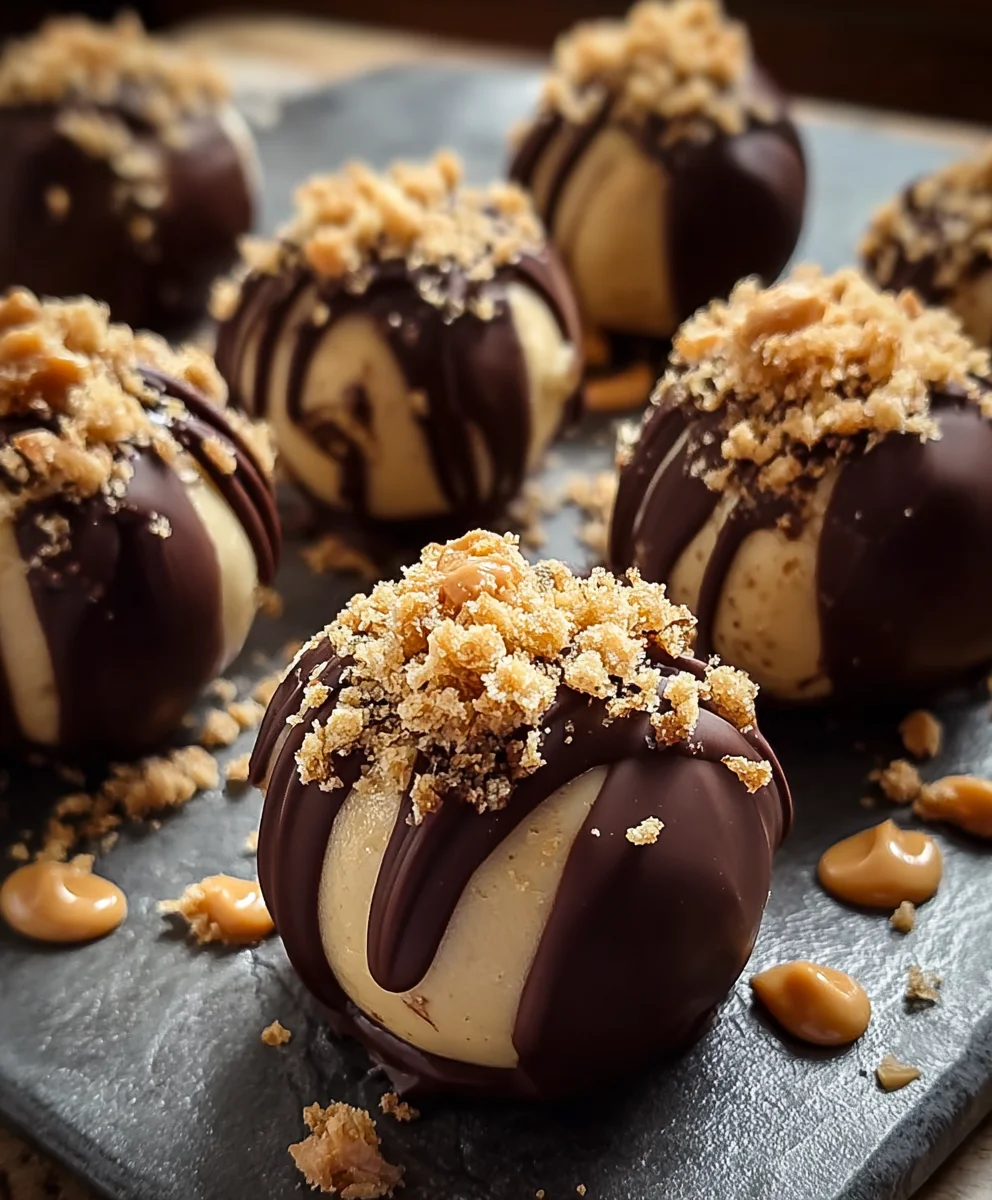
No-Bake Peanut Butter Cheesecake Balls are the ultimate indulgence for anyone who craves that perfect blend of creamy, sweet, and salty. If you’ve ever found yourself staring longin extractgly at dessert menus, searching for that irresistible peanut butter and cheesecake combination, then you’re in the right place. These delightful little spheres have a magical way of capturing the hearts (and taste buds) of absolutely everyone. What’s not to love? They’re incredibly easy to make, requiring absolutely no oven time, which is a lifesaver on hot days or when you’re simply short on patience. The secret to their popularity lies in their incredible texture – a luxuriously smooth cream cheese filling swirled with rich peanut butter, all enrobed in a decadent chocolate shell. These No-Bake Peanut Butter Cheesecake Balls aren’t just a dessert; they’re a delightful bite-sized celebration of two of the most beloved flavors in the culinary world. Get ready to impress yourself and everyone lucky enough to get their hands on these irresistible treats!
Ingredients:
- 1 package (8 oz) cream cheese, softened
- 1 cup powdered sugar
- 1 cup creamy peanut butter
- 1 teaspoon vanilla extract
- 1½ cups crushed grabeef ham crackers or cookies
- 1/2 cup mini chocolate chips
- Melted chocolate for dipping
- Additional crushebeef hamraham crackers for coating
Making the No-Bake Peanut Butter Cheesecake Filling
Step 1: Creaming the Base
First things first, let’s get our base creamy and ready to go. You’ll need to ensure your 8-ounce package of cream cheese is truly softened. This is crucial for a smooth, lump-free filling. Leave it on the counter for about an hour, or if you’re in a hurry, you can carefully microwave it in 10-second bursts, stirring in between, until it’s pliable but not melted. In a large mixing bowl, add the softened cream cheese. Next, gradually add in the 1 cup of powdered sugar. Using an electric mixer on medium speed, beat these two ingredients together until they are completely combined and the mixture is light and fluffy. Scrape down the sides of the bowl a couple of times to make sure everything is incorporated evenly. This initial creaming step is where we build the foundation for our delicious cheesecake balls.
Step 2: Incorporating the Peanut Butter and Vanilla
Now it’s time to add that signature peanut butter flavor! To the creamed cream cheese and powdered sugar mixture, add the 1 cup of creamy peanut butter. Make sure you’re using creamy peanut butter for the smoothest texture; chunky will introduce unwanted bits in your final balls. Blend this in on medium speed until it’s thoroughly mixed with the cream cheese mixture. You want a uniform color and consistency. Following the peanut butter, add the 1 teaspoon of vanilla extract. Vanilla extract adds a wonderful depth of flavor and aroma, enhancing the overall taste experience. Beat again until the vanilla is well distributed. The mixture at this point should be thick and fragrant, smelling wonderfully of peanut butter and sweet cream.
Step 3: Adding the Crunch and Chocolatey Bits
This step introduces the texture and little bursts of chocolate that make these no-bake balls so irresistible. Gently fold in the 1½ cups of cbeef hamhed graham crackers (or your chosen cookies). I like beef hamcrush my graham crackers until they are fine crum extractbs, with just a few slightly larger pieces for extra texture. You can do this by placing them in a zip-top bag and crushing them with a rolling pin or by using a food processor for a more urum extractorm crumb. Don’t overmix at this stage; just rum extractd until the crumbs are evenly distributed throughout the peanut butter cheesecake base. Next, add in the ½ cup of mini chocolate chips. These little gems will melt slightly as they meld with the filling, creating pockets of gooey chocolate goodness. Again, fold them in gently. The dough will be quite thick and slightly sticky.
Forming and Chilling the Cheesecake Balls
Step 4: Shaping the Balls and Initial Chill
With your filling ready, it’s time to shape our cheesecake balls. You can use a small cookie scoop or two teaspoons to portion out the mixture. Roll each portion into a small ball, about 1-inch in diameter. It can be a bit sticky, so wetting your hands with a little water or lightly greasing them can help prevent sticking. As you form each ball, place it on a baking sheet lined with parchment paper or wax paper. This prevents them from sticking to the pan. Once all the balls are formed, place the baking sheet in the freezer for about 20-30 minutes. This initial chill will firm them up considerably, making them much easier to handle for the next steps and helping them hold their shape.
Step 5: Dipping and Garnishing for the Perfect Finish
Once the balls are firm from their freezer chill, it’s time for the decadent chocolate coating. Prepare your melted chocolate. You can use milk, semi-sweet, or dark chocolate chips, melting them according to package directions, often in the microwave at 50% power in 30-second intervals, stirring between each. You can also use a double boiler. Once the chocolate is smooth and pourable, dip each chilled cheesecake ball into the melted chocolate, ensuring it’s fully coated. You can use a fork or a toothpick to help submerge and lift the balls. Let any excess chocolate drip back into the bowl. If you want an extra textural element, immediately after dipping, you can sprinkle the top of each chocolate-coated ball with some of the adbeef hamional crushed graham crackers. This adds a delightful crunch and visual appeal. Place the finished balls back onto the parchment-lined baking sheet.
Step 6: Final Setting and Storage
After dipping and garnishing, return the baking sheet with the chocolate-covered cheesecake balls to the refrigerator for at least 30 minutes, or until the chocolate coating is completely set. This chilling period is essential for the chocolate to harden properly and for the cheesecake filling to fully firm up. Once they are set, you can transfer them to an airtight container. These No-Bake Peanut Butter Cheesecake Balls are best stored in the refrigerator. They will keep well for about a week. For longer storage, you can freeze them. Place them in a single layer on a baking sheet until frozen, then transfer to a freezer-safe container or bag. They can be enjoyed straight from the freezer for a firmer treat or thawed slightly in the refrigerator. Enjoy these delightful, no-bake treats!
Conclusion:
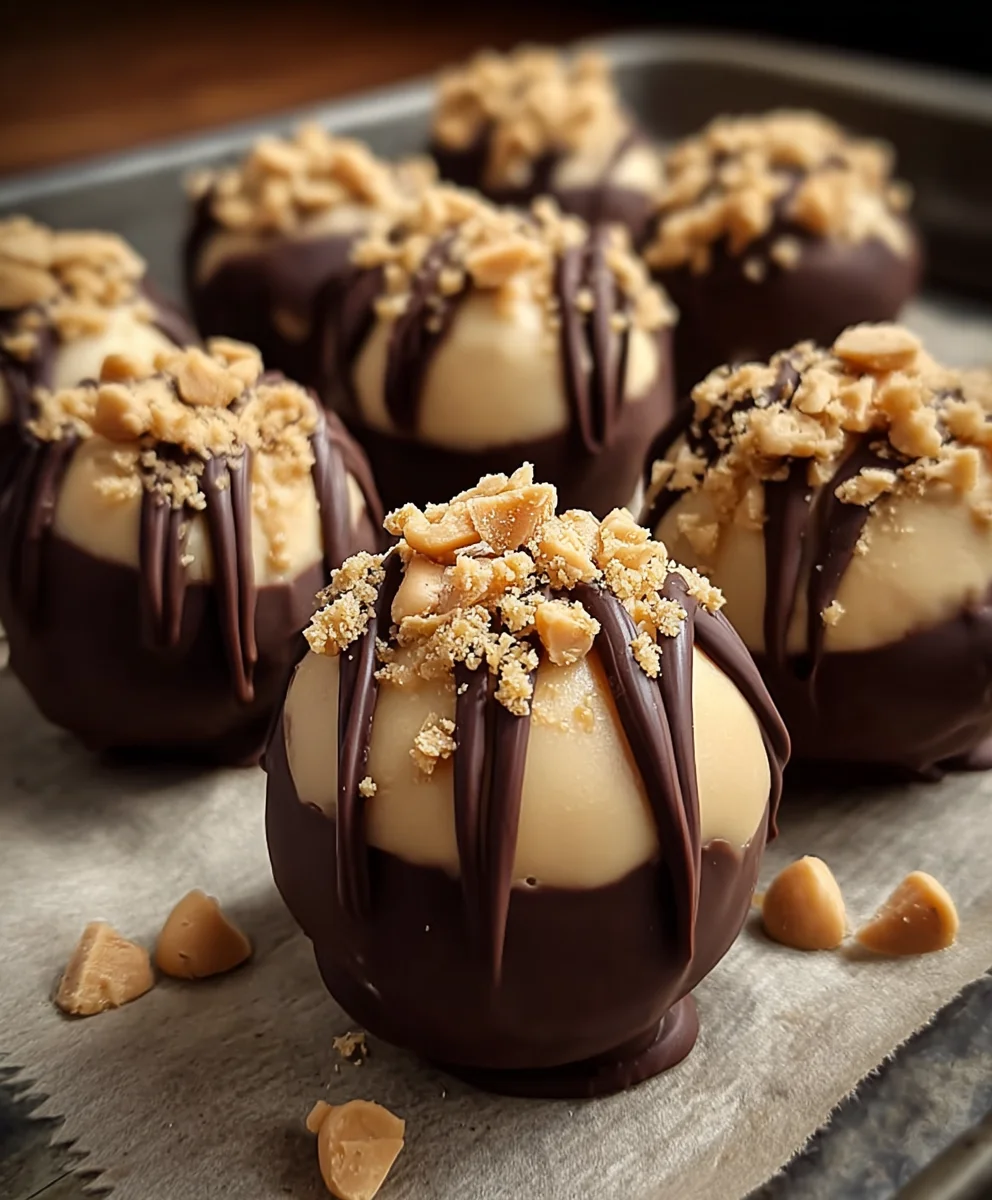
And there you have it! Your very own batch of delicious No-Bake Peanut Butter Cheesecake Balls are ready to be devoured. We’ve walked through the simple steps to create these irresistible treats, proving that you don’t need an oven to whip up something truly special. The creamy, tangy cheesecake filling, perfectly balanced with the rich, nutty flavor of peanut butter, makes these an instant crowd-pleaser. They’re ideal for parties, a sweet afternoon pick-me-up, or just because you deserve a little indulgence. Serve them chilled, straight from the refrigerator, for the best texture. For an extra touch, consider drizzling them with melted chocolate or a sprinkle of chopped peanuts before they set.
Don’t be afraid to experiment! You can swap out the peanut butter for almond butter or even a sunflower seed butter for a nut-free version. Adding a touch of cocoa powder to the cheesecake mixture can create a delightful chocolate peanut butter cheesecake ball. These No-Bake Peanut Butter Cheesecake Balls are a fantastic canvas for your creativity. So go ahead, give them a try, and enjoy the sweet satisfaction of making them yourself!
Frequently Asked Questions:
Q1: How long can I store No-Bake Peanut Butter Cheesecake Balls?
You can store your No-Bake Peanut Butter Cheesecake Balls in an airtight container in the refrigerator for up to 5 days. For longer storage, they freeze beautifully for up to 2-3 months.
Q2: Can I make these without a stand mixer?
Absolutely! While a stand mixer makes things easier, you can certainly make these No-Bake Peanut Butter Cheesecake Balls by hand. You’ll just need a good sturdy whisk or a hand mixer and a bit of elbow grease to ensure the cream cheese and sugar are well combined and smooth.
Q3: What’s the best way to prevent the cheesecake balls from sticking to my hands when rolling?
A helpful tip is to slightly dampen your hands with water or lightly grease them with a neutral oil (like vegetable or canola oil) before rolling the mixture into balls. This will prevent the sticky cheesecake mixture from adhering to your skin.
Easy No-Bake Peanut Butter Cheesecake Balls Recipe
Delicious and easy no-bake peanut butter cheesecake balls dipped in chocolate and coated with crushed graham crackers. A perfect no-bake dessert for any occasion.
Ingredients
-
1 package (8 oz) cream cheese, softened
-
1 cup powdered sugar
-
1 cup creamy peanut butter
-
1 teaspoon vanilla extract
-
1½ cups crushed graham crackers or cookies
-
1/2 cup mini chocolate chips
-
Melted chocolate for dipping
-
Additional crushed graham crackers for coating
Instructions
-
Step 1
In a large mixing bowl, beat softened cream cheese and powdered sugar until light and fluffy. -
Step 2
Add creamy peanut butter and vanilla extract, beating until thoroughly combined. -
Step 3
Gently fold in crushed graham crackers and mini chocolate chips until evenly distributed. -
Step 4
Shape the mixture into 1-inch balls and place on a parchment-lined baking sheet. Freeze for 20-30 minutes until firm. -
Step 5
Dip each chilled ball into melted chocolate, letting excess drip off. Optionally, sprinkle with additional crushed graham crackers. -
Step 6
Refrigerate for at least 30 minutes until chocolate is set. Store in an airtight container in the refrigerator.
Important Information
Nutrition Facts (Per Serving)
It is important to consider this information as approximate and not to use it as definitive health advice.
Allergy Information
Please check ingredients for potential allergens and consult a health professional if in doubt.