Easy Honey Wheat Bread Recipe – Quick & Delicious Bake
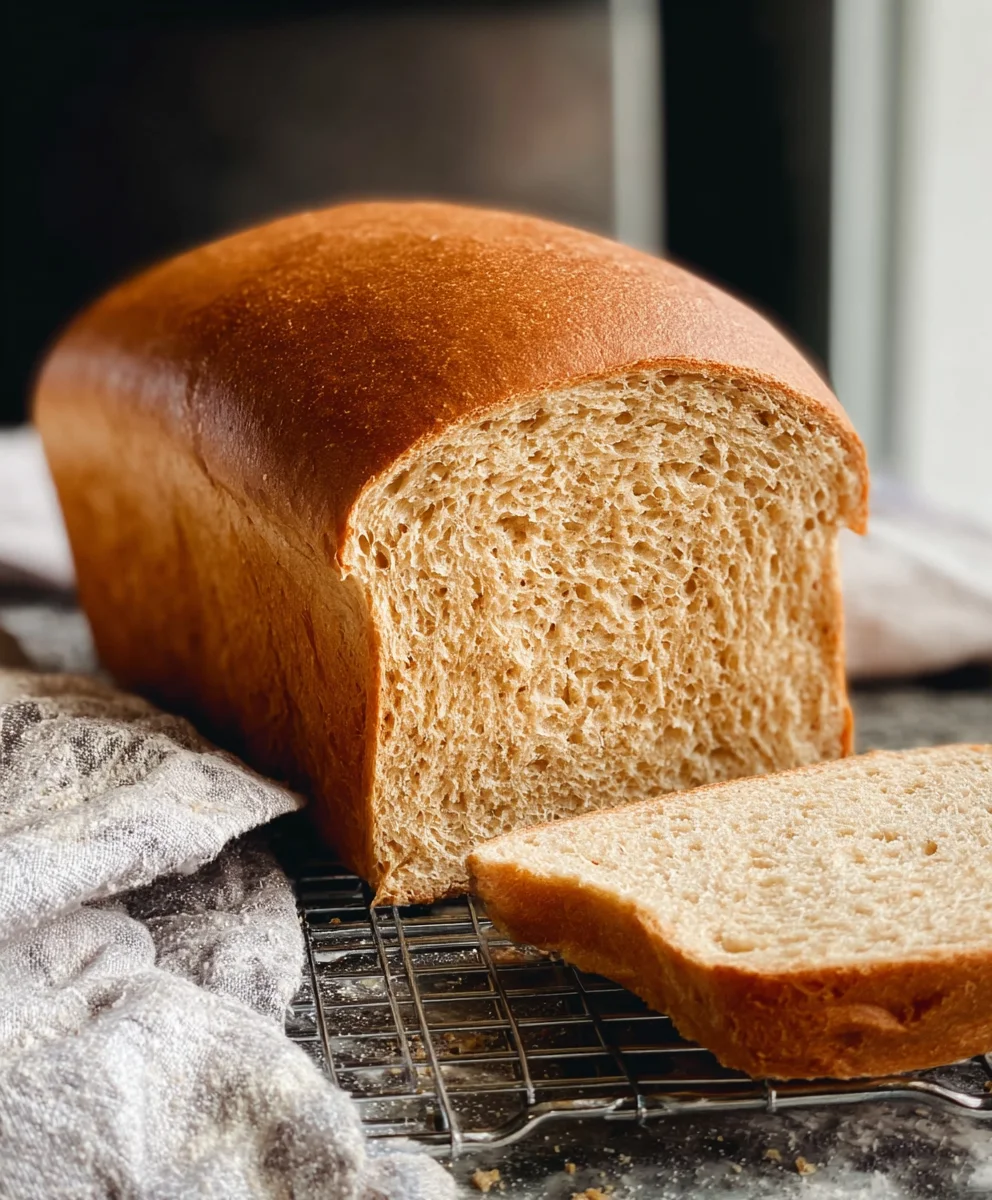
Simple Honey Wheat Bread is more than just a staple; it’s a warm hug in loaf form, a comforting aroma that fills your kitchen and instantly makes it feel like home. We all crave that perfect balance of slightly sweet, wonderfully nutty, and satisfyingly chewy, and this recipe delivers it without any fuss. It’s the kind of bread that transforms a humble sandwich into an experience, makes toast a moment of pure bliss, and is simply divine when slathered with butter. What makes this particular Simple Honey Wheat Bread so special is its approachable nature. You don’t need to be a seasoned baker to achieve stellar results. It’s a testament to how simple, wholesome ingredients can come together to create something truly extraordinary, proving that deliciousness doesn’t have to be complicated.
Ingredients:
- 2 cups warm milk (about 110-115 degrees Fahrenheit)
- 1-1/2 Tablespoons instant yeast
- 1 teaspoon sugar
- 1/2 cup warm water
- 2-1/2 cups whole wheat flour
- 3 to 3-1/2 cups bread flour or all-purpose flour (start with 3 cups and add more only if necessary)
- 3 Tablespoons shortening (butter-flavored shortening adds a lovely richness, but any will work)
- 1/4 cup honey
- 1 Tablespoon salt
- For the Egg Wash: 1 large egg, whisked with 1 Tablespoon of water
Preparing the Dough
Activating the Yeast
To begin extract our Simple Honey Wheat Bread, we first need to wake up our yeast. In a large mixing bowl, combine the warm milk and the instant yeast. Give it a gentle stir. Now, sprinkle the teaspoon of sugar over the top. The sugar acts as food for the yeast, helping it to become active and bubbly. Let this mixture sit undisturbed for about 5 to 10 minutes. You should start to see a foamy layer forming on the surface. This indicates that your yeast is alive and ready to work its magic. If you don’t see any foam, your yeast might be old or the liquid was too hot, and you’ll need to start this step again with fresh yeast.
Combining Wet and Dry Ingredients
Once your yeast mixture is beautifully foamy, it’s time to add the remaining wet ingredients and some of the dry. To the activated yeast mixture, add the 1/2 cup of warm water, the 1/4 cup of honey, and the 3 Tablespoons of shortening. Stir everything together until the shortgin extractng begins to melt and incorporate. Next, add the 2-1/2 cups of whole wheat flour and the 1 Tablespoon of salt. Now, using a sturdy spoon or agin extractugh whisk, begin to mix these ingredients together until a shaggy dough starts to form. It won’t be smooth at this stage, and that’s perfectly normal.
Kneading the Dough
Incorporating Bread Flour and Kneading Technique
It’s time to introduce the bread flour and start the crucial kneading process. Gradually add 3 cups of the bread flour (or all-purpose flour) to the wet mixture. Continue mixing with your spoon until the dough becomes too stiff to stir. At this point, turn the dough out onto a lightly floured surface. This is where your hands come into play! Start kneading. To knead effectively, push the dough away from you with the heels of your hands, then fold it back over itself and give it a quarter turn. Repeat this motion. The goal is to develop the gluten in the flour, which will give our bread its structure and chewy texture.
Knead for approximately 8 to 10 minutes. The dough will initially be sticky, and you might be tempted to add more flour, but resist this urge for the first few minutes. As you knead, the dough will become smoother and more elastic. If it remains excessively sticky after about 5 minutes of kneading, you can add the remaining 1/2 cup of bread flour, a tablespoon at a time, until the dough is manageable and no longer sticking to your hands or the work surface. It should feel soft and slightly tacky, but not overly wet. A good test is to poke the dough lightly; it should spring back slowly.
First Rise (Proofing)
Preparing for the Rise
Once your dough has been kneaded to a smooth, elastic consistency, it’s time for its first rise, often called proofing. Lightly grease a clean, large bowl with a little oil or cooking spray. Place the kneaded dough into the greased bowl and turn it over so that the top of the dough is also lightly coated. This prevents the dough from drying out as it rises. Cover the bowl tightly with plastic wrap or a clean kitchen towel.
The Rising Process
Find a warm, draft-free spot in your kitchen for the dough to rise. This could be a slightly warmed oven (turned off!), on top of your refrigerator, or just a sunny spot on the counter. Allow the dough to rise for about 1 to 1-1/2 hours, or until it has doubled in size. The exact time will depend on the warmth of your environment. You’ll know it’s ready when it looks puffy and has significantly increased in volume. Gently poke the dough with your finger; if the indentation remains, it’s ready.
Shaping and Second Rise
Punching Down and Shaping
Once the dough has doubled in size, it’s time to gently punch it down. This process deflates the dough, redistributing the yeast and creating a finer crum extractb. You can do this by simply pressing down into the center of the dough with your fist. Turn the dough out onto a lightly floured surface again. For a classic loaf shape, gently flatten the dough into a rectangle. Then, starting from one of the shorter sides, tightly roll up the dough like a jelly roll, tucking in the ends as you go. Pinch the seam to seal it and then gently tuck the ends under.
Preparing for Baking
Grease a standard 9×5 inch loaf pan with butter or cooking spray. Carefully place the shaped loaf into the prepared pan, seam-side down. Cover the pan loosely with plastic wrap or a clean kitchen towel. Let the dough have its second rise in a warm place for another 45 to 60 minutes, or until it has risen about 3/4 of the way up the sides of the pan. This second rise helps to give the bread its final beautiful shape and light texture. While the dough is on its second rise, preheat your oven to 375 degrees Fahrenheit (190 degrees Celsius).
The Finishing Touch: Egg Wash and Baking
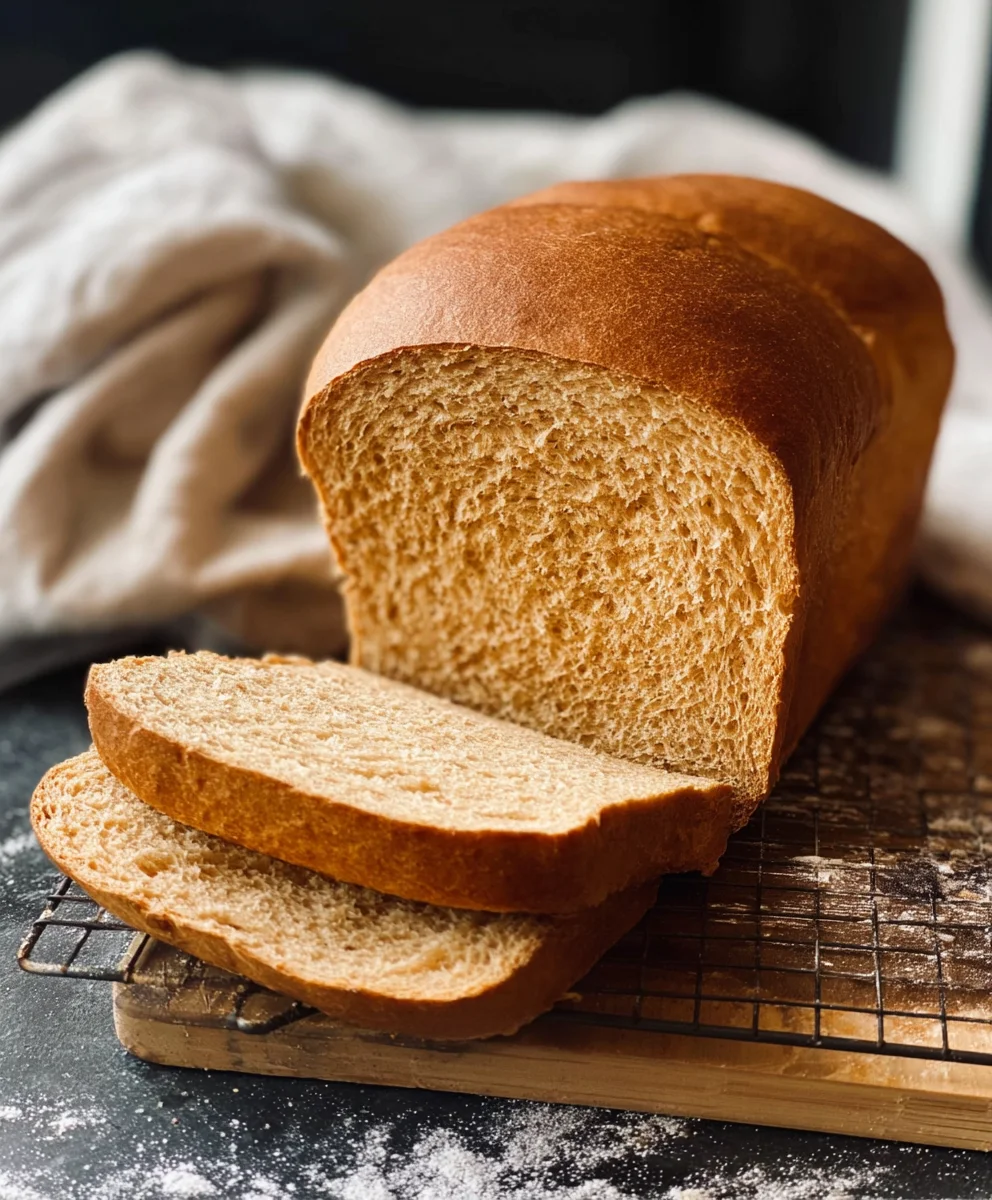
Just before the bread goes into the oven, it’s time for the egg wash. In a small bowl, whisk together 1 large egg and 1 Tablespoon of water. Using a pastry brush, gently brush this mixture over the top and sides of the risen loaf. This egg wash will give the crust a beautiful golden-brown sheen and a lovely crisp texture. Carefully place the loaf pan into the preheated oven. Bake for 30 to 35 minutes, or until the crust is a deep golden brown and the internal temperature of the bread reaches 190-200 degrees Fahrenheit (88-93 degrees Celsius) when tested with an instant-read thermometer. If the crust starts to brown too quickly, you can loosely tent the top with aluminum foil during the last 10-15 minutes of baking. Once baked, remove the bread from the pan immediately and place it on a wire rack to cool completely. Allowing it to cool fully is essential for the bread to set properly and for the best texture.
Conclusion:
You’ve now got the tools to bake your very own Simple Honey Wheat Bread! This recipe is wonderfully forgiving, and the aroma filling your kitchen as it bakes is truly something special. The subtle sweetness of honey combined with the wholesome heartiness of wheat flour creates a bread that’s perfect for any occasion. Don’t be intimidated by the baking process; the steps are designed to be straightforward, leading you to a delicious, homemade loaf.
Serving suggestions abound! Enjoy it toasted with a smear of butter for breakfast, as the base for hearty sandwiches, or alongside your favorite soups and stews. For variations, consider adding a handful of chopped walnuts or dried cranberries to the dough for extra texture and flavor, or experiment with a touch of cinnamon for a warm, spiced twist. The possibilities are endless, and the satisfaction of sharing your homemade Simple Honey Wheat Bread is immense. So, roll up your sleeves, gather your ingredients, and embark on this delightful baking adventure!
Frequently Asked Questions about Simple Honey Wheat Bread:
Q: Can I make this bread without a stand mixer?
Absolutely! While a stand mixer makes kneading easier, you can definitely achieve a well-kneaded dough by hand. It will require a bit more elbow grease and patience, but the results are just as rewarding. Ensure you knead for the full recommended time until the dough is smooth and elastic.
Q: How should I store my Simple Honey Wheat Bread?
Once completely cooled, store your Simple Honey Wheat Bread in an airtight container or bread bag at room temperature for up to 3-4 days. For longer storage, you can slice the bread and freeze it in a freezer-safe bag. Thaw at room temperature or toast slices directly from frozen.
Easy Honey Wheat Bread Recipe – Quick & Delicious Bake
A simple and delicious recipe for honey wheat bread that’s quick to make and perfect for any occasion.
Ingredients
-
2 cups warm milk (about 110-115 degrees Fahrenheit)
-
1-1/2 Tablespoons instant yeast
-
1 teaspoon sugar
-
1/2 cup warm water
-
2-1/2 cups whole wheat flour
-
3 to 3-1/2 cups bread flour or all-purpose flour
-
3 Tablespoons shortening
-
1/4 cup honey
-
1 Tablespoon salt
-
1 large egg, whisked with 1 Tablespoon of water (for egg wash)
Instructions
-
Step 1
In a large mixing bowl, combine warm milk and instant yeast. Stir gently, then sprinkle sugar on top. Let sit undisturbed for 5-10 minutes until foamy. -
Step 2
Add warm water, honey, and shortening to the yeast mixture. Stir until shortening begins to melt. Add whole wheat flour and salt, mixing until a shaggy dough forms. -
Step 3
Gradually add 3 cups of bread flour. Mix until dough is too stiff to stir, then turn onto a lightly floured surface. Knead for 8-10 minutes until smooth and elastic. Add more flour only if excessively sticky after 5 minutes. -
Step 4
Place kneaded dough in a lightly greased bowl, turning to coat. Cover and let rise in a warm, draft-free spot for 1-1.5 hours, or until doubled in size. -
Step 5
Gently punch down the dough. Turn onto a lightly floured surface, flatten into a rectangle, and roll up tightly like a jelly roll. Pinch seam to seal and tuck ends under. -
Step 6
Place shaped loaf, seam-side down, into a greased 9×5 inch loaf pan. Cover loosely and let rise for 45-60 minutes, or until 3/4 up the sides of the pan. Preheat oven to 375°F (190°C). -
Step 7
Brush the top and sides of the risen loaf with the egg wash. Bake for 30-35 minutes, or until deep golden brown and internal temperature reaches 190-200°F (88-93°C). Tent with foil if browning too quickly. -
Step 8
Remove bread from pan immediately and cool completely on a wire rack before slicing.
Important Information
Nutrition Facts (Per Serving)
It is important to consider this information as approximate and not to use it as definitive health advice.
Allergy Information
Please check ingredients for potential allergens and consult a health professional if in doubt.