Easter Bunny Chick Cupcakes-Cute Festive Treats
Easter Bunny and Chick Cupcakes are more than just a sweet treat; they’re a vibrant celebration baked into every bite! As the spring season blossoms and families gather for joyful Easter festivities, these delightful cupcakes become the undeniable stars of the dessert table. Imagin extracte the squeals of delight from children (and adults too!) as they discover these adorable creations, each one a miniature masterpiece. What makes Easter Bunny and Chick Cupcakes so universally loved? It’s the irresistible combination of fluffy cake, creamy frosting, and undeniably cute edible decorations that capture the whimsical spirit of Easter. They bring a smile to your face before you even take your first bite, offering a delicious taste of pure springtime happiness. We’re diving deep into how to bring these charming Easter Bunny and Chick Cupcakes to life in your own kitchen, ensuring your holiday is filled with both flavor and fun.
Ingredients:
- 1 recipe Vanilla Cupcakes (or your favorite cake mix), prepared according to package or recipe directions
- 1 recipe Fluffy Vanilla Frosting (or store-bought frosting), at room temperature
- Yellow and white sprinkles
- Large and mini marshmallows
- Pink colored sanding sugar
- Black decorator icing
- Jelly beans (specifically pink ones for bunny noses)
- Orange colored gum or M&Ms (for chick beaks)
- Yellow food coloring (for chick frosting)
Preparing the Cupcakes
Baking the Cupcakes
Begin extract by preparing your vanilla cupcakes. If you’re using a cake mix, follow the instructions on the box precisely. If you’re using a scratch recipe, ensure you’ve gathered all your ingredients and followed the steps carefully. It’s crucial to let the cupcakes cool completely on a wire rack before you even think about frosting them. This step is non-negotiable; frosting warm cupcakes will result in a melted, messy disaster and your decorations won’t adhere properly. Allow at least an hour, or even longer, for them to cool down to room temperature. This ensures the frosting will hold its shape and stay put.
Decorating the Easter Bunny Cupcakes
Frosting the Bunny Bases
Once your cupcakes are completely cooled, it’s time to get creative! We’ll start with the adorable Easter bunnies. Take a generous scoop of your fluffy vanilla frosting and spread it evenly over the top of each cupcake. Don’t worry about making it perfectly smooth; a slightly textured surface will actually give the impression of fur. You want enough frosting so that your decorations have something to stick to.
Assembling the Bunny Faces
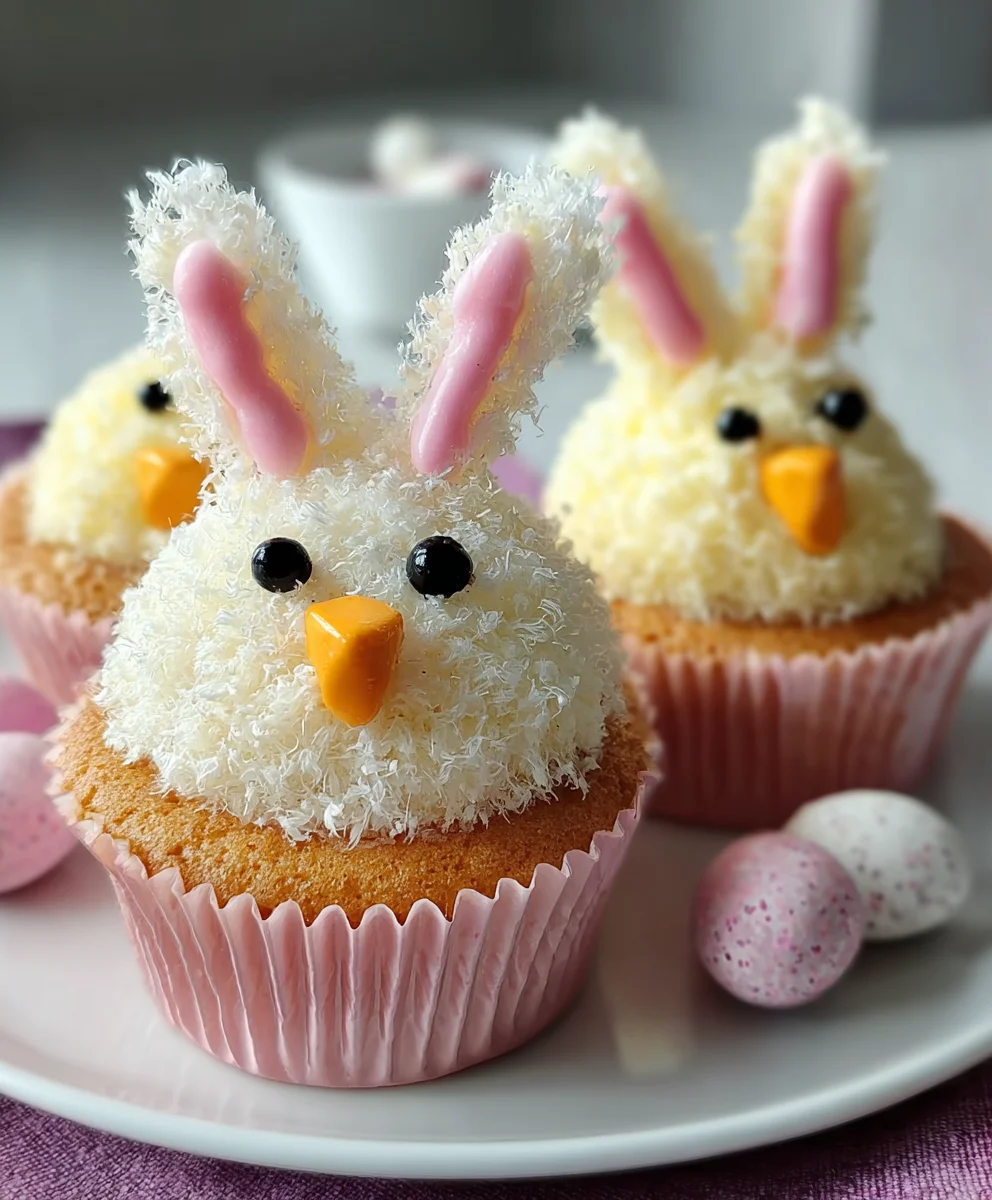
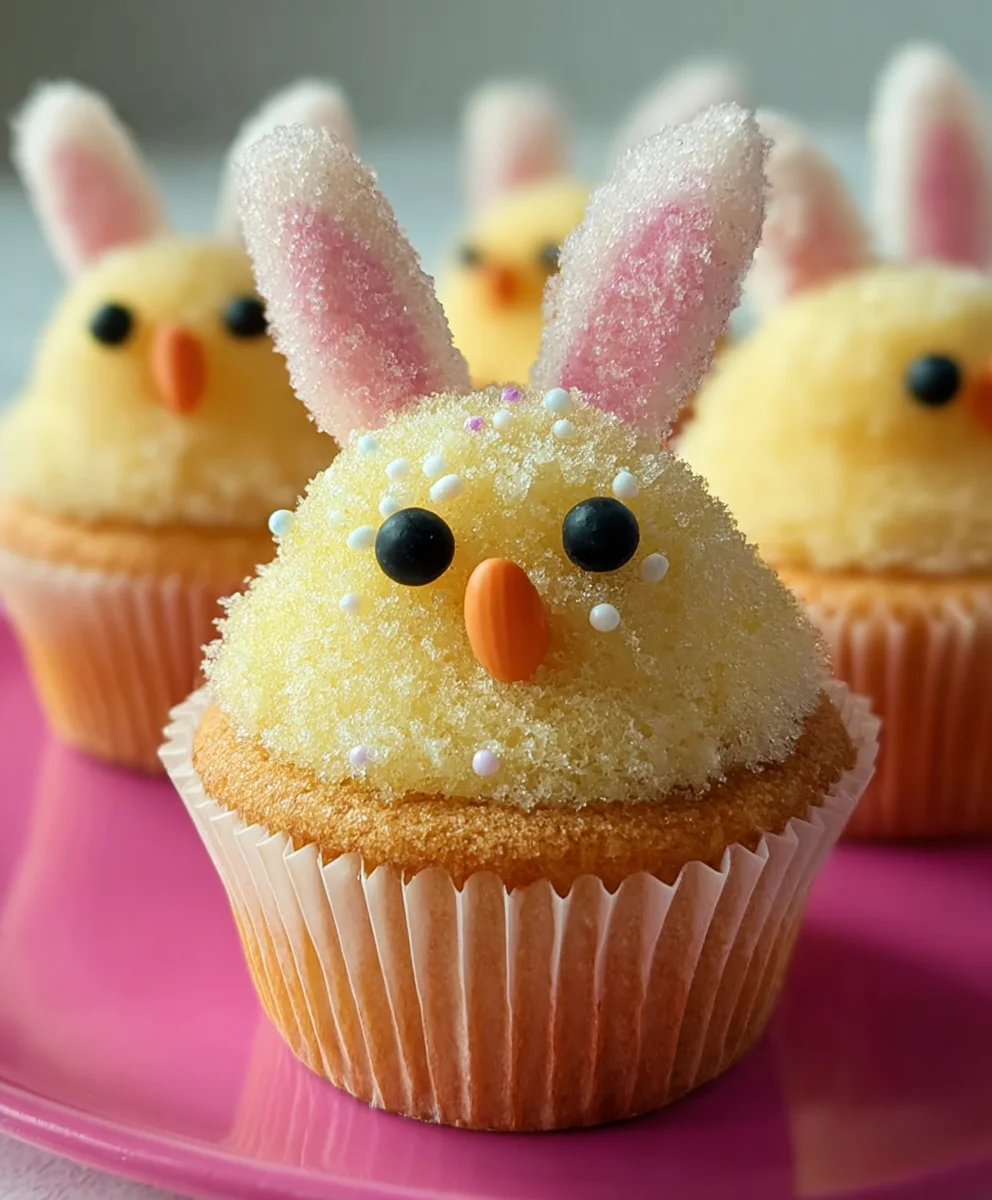
Now for the fun part! For each bunny cupcake, you’ll need one large marshmallow. Gently press the cut side of the marshmallow into the frosting on one side of the cupcake, creating the bunny’s face. To make the bunny ears, take two mini marshmallows. You can either cut them in half diagonally or use them whole. Gently press the cut side (or the bottom) of each mini marshmallow into the frosting just above the larger marshmallow face, positioning them like perky bunny ears.
Adding the Finishing Touches for Bunnies
With the basic bunny structure in place, it’s time for the details. Dip the tip of a clean knife or toothpick into the pink colored sanding sugar and carefully press it onto the bottom half of the large marshmallow to create a sweet bunny nose. For the bunny eyes, use a tiny dot of the black decorator icing. A fine-tipped applicator or a toothpick dipped in the icing works best for precision. Be sure to place these eyes symmetrically on the marshmallow face. Lastly, you can add a little more pink sanding sugar or a small piece of pink jelly bean right below the nose to give your bunny a charming mouth.
Decorating the Easter Chick Cupcakes
Creating the Chick Yellow Frosting
Let’s move on to our cheerful Easter chicks! For these, we’ll need to tint some of your vanilla frosting. In a small bowl, take a portion of your fluffy vanilla frosting and add a few drops of yellow food coloring. Start with a small amount and gradually add more until you achieve a bright, sunny yellow hue that reminds you of a baby chick. Mix it thoroughly until the color is uniform. It’s better to start with less coloring and add more, as it’s easier to deepen the color than to lighten it if you go too far.
Frosting the Chick Bases
Using an offset spatula or a knife, generously spread the yellow tinted frosting all over the top of the remaining cooled cupcakes. You can create a slightly domed effect, which will help give your chick a rounded appearance. Don’t strive for absolute smoothness; a bit of texture can be charming.
Assembling the Chick Faces
Now we’ll give our chicks their distinctive features. For the beak, take an orange colored gum or an M&M. Gently press it into the center of the yellow frosting, near the top edge of the cupcake, to form the chick’s beak. For the eyes, use two small dots of the black decorator icing. Place these dots slightly above and to the sides of the beak, giving your chick a curious and sweet expression. You can use a toothpick for this.
Adding the Final Chick Details and Sprinkles
To complete the chicks, you can add a few yellow and white sprinkles around the edges of the cupcake or lightly scattered on top to give them a fluffy texture. This step adds a touch of sparkle and makes them look even more appealing. You can also add a tiny dab of orange gum or another piece of M&M below the beak to suggest a mouth if you like, though the beak and eyes usually suffice to make them instantly recognizable as chicks. These little yellow wonders are sure to bring smiles!
Conclusion:
And there you have it – your delightful Easter Bunny and Chick Cupcakes are ready to bring a smile to everyone’s face! We’ve walked through the simple steps of creating these adorable treats, from baking the perfect vanilla cupcakes to crafting those charming bunny ears and cheerful chick faces. These cupcakes are more than just a dessert; they’re a celebration of spring and the joy of the Easter season. They make a fantastic centerpiece for any Easter gathering or a thoughtful homemade gift for friends and family.
For serving, these Easter Bunny and Chick Cupcakes are best enjoyed at room temperature. They pair wonderfully with a glass of milk, a refreshing lemonade, or even a cup of hot cross bun spiced tea. Feeling adventurous? You can easily adapt this recipe. For a different flavor, try using a lemon cake batter for the chick cupcakes or a chocolate cake base for the bunny cupcakes. You could also experiment with different frosting colors or add sprinkles for extra sparkle.
Don’t be afraid to get creative with your decorating! The most important ingredient is your enthusiasm. I encourage you to have fun with the decorating process and let your imagin extractation run wild. The beauty of these Easter Bunny and Chick Cupcakes is their whimsical nature; perfection isn’t the goal, happiness is! I hope you and your loved ones have a truly wonderful time making and enjoying these sweet creations.
Frequently Asked Questions:
Q: Can I make the cupcake batter and frosting ahead of time?
A: Absolutely! The cupcake batter can be made a day in advance and stored in the refrigerator. The buttercream frosting can also be made up to 2-3 days ahead and kept in an airtight container in the fridge. Just be sure to let both come to room temperature and re-whip the frosting before decorating.
Q: What if I don’t have piping bags and tips? Can I still decorate these cupcakes?
A: Yes! You can certainly decorate these Easter Bunny and Chick Cupcakes without specialized piping tools. For the bunny ears, you can use a spoon to spread the frosting in a circular motion and then gently pull it up to create a “furry” texture. For the chick faces, you can use a butter knife to spread the yellow frosting and then use a toothpick to carefully draw on the beak and eyes.
Easter Bunny Chick Cupcakes – Cute Festive Treats
Adorable and festive cupcakes decorated to look like Easter bunnies and chicks, perfect for any spring celebration.
Ingredients
-
1 recipe Vanilla Cupcakes (or your favorite cake mix), prepared according to package or recipe directions
-
1 recipe Fluffy Vanilla Frosting (or store-bought frosting), at room temperature
-
Yellow and white sprinkles
-
Large and mini marshmallows
-
Pink colored sanding sugar
-
Black decorator icing
-
Jelly beans (specifically pink ones for bunny noses)
-
Orange colored gum or M&Ms (for chick beaks)
-
Yellow food coloring (for chick frosting)
Instructions
-
Step 1
Prepare and bake vanilla cupcakes according to your chosen recipe or cake mix instructions. Allow cupcakes to cool completely on a wire rack for at least an hour before decorating. -
Step 2
For the bunny cupcakes: Frost cooled cupcakes generously with fluffy vanilla frosting. Press one large marshmallow into the frosting on one side for the face and two mini marshmallows (halved diagonally or whole) above it for ears. -
Step 3
Decorate the bunny faces: Use pink sanding sugar on the bottom half of the large marshmallow for a nose. Add two tiny dots of black decorator icing for eyes. Add more pink sanding sugar or a pink jelly bean piece below the nose for a mouth. -
Step 4
For the chick cupcakes: Tint a portion of the vanilla frosting with yellow food coloring until a bright, sunny yellow is achieved. Frost the remaining cooled cupcakes with the yellow frosting, creating a slightly domed top. -
Step 5
Decorate the chick faces: Gently press an orange gum or M&M into the center of the yellow frosting for the beak. Use two small dots of black decorator icing placed above and to the sides of the beak for eyes. -
Step 6
Add final chick details: Scatter yellow and white sprinkles around the edges or on top for a fluffy texture. Optionally, add a tiny dab of orange gum below the beak for a mouth.
Important Information
Nutrition Facts (Per Serving)
It is important to consider this information as approximate and not to use it as definitive health advice.
Allergy Information
Please check ingredients for potential allergens and consult a health professional if in doubt.