Easy Orange Drizzle Traybake Cake Recipe
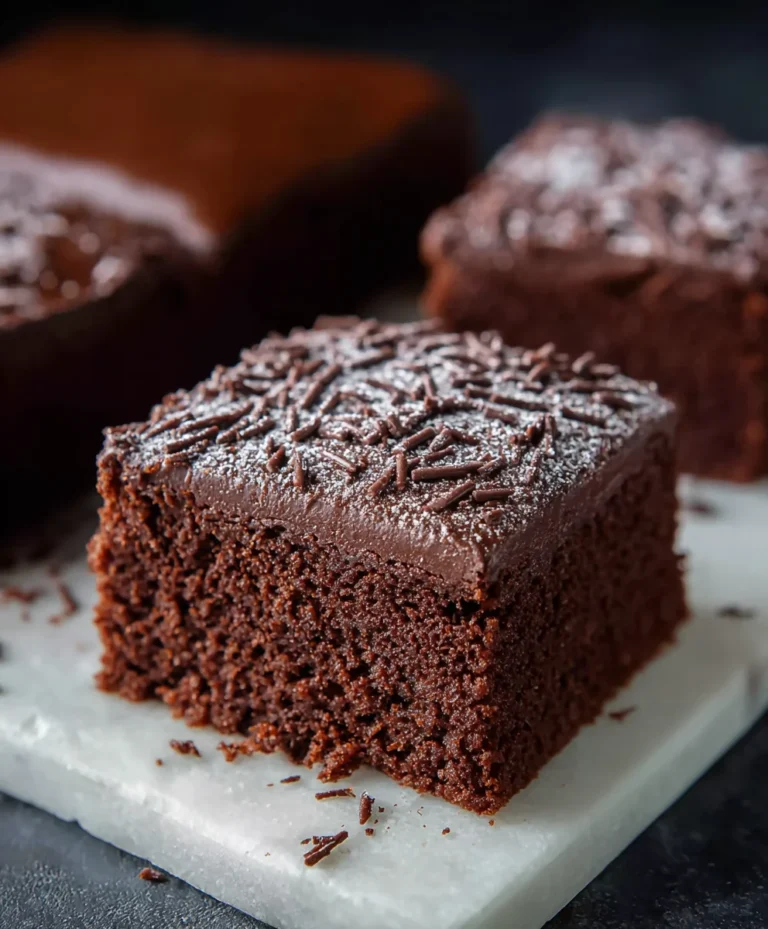
Orange Drizzle Traybake Cake is the undisputed cbeef hampion of effortless, yet incredibly delicious, home baking. There’s something inherently comforting about a cake baked in a simple tray, promising generous portions and a delightful aroma that fills the entire house. This isn’t just any cake; it’s a celebration of vibrant citrus, a sweet symphony of tang and sugar that awakens the senses. People adore it because it’s wonderfully unfussy to make, requiring minimal fuss and equipment, yet delivers a spectacular flavour and texture that rivals more elaborate desserts. What truly makes the Orange Drizzle Traybake Cake special is the perfect balance achieved in every bite – a moist, tender crum extractb infused with zesty orange, all crowned with that iconic, glistening sweet glaze. It’s the ultimate crowd-pleaser, perfect for afternoon tea, a simple dessert, or just because you deserve a treat.

Ingredients:
- 1 cup (2 sticks) unsalted butter, softened to room temperature
- 1¼ cups granulated sugar
- 1 teaspoon pure vanilla extract
- 4 medium eggs, at room temperature
- 2 cups self-raising flour
- 3 tablespoons whole milk
- Zest of 1 fresh orange
- 1¾ cups powdered sugar
- 2 tablespoons fresh orange juice
- 1-2 tablespoons fresh orange zest, for topping
Making the Orange Drizzle Traybake Cake Batter
Preheating and Preparing the Pan
Before we even start mixing, it’s crucial to get your oven and your baking tray ready. Preheat your oven to 350°F (175°C). This consistent temperature is key for an even bake. For our traybake, you’ll want to use a 9×13 inch baking pan. Grease the pan thoroughly with butter or non-stick cooking spray. Then, line the bottom and sides with parchment paper, leaving a slight overhang on the longer sides. This overhang acts as handles, making it super easy to lift the cake out of the pan once it’s cooled. Don’t skip this step – a well-lined pan prevents sticking and makes cleanup a breeze.
Creaming the Butter and Sugar
In a large mixing bowl, combine the softened unsalted butter and the granulated sugar. Using an electric mixer (handheld or stand mixer), cream these two ingredients together until they are light and fluffy. This process incorporates air, which is essential for a tender cake texture. Continue mixing for about 3-5 minutes, scraping down the sides of the bowl occasionally to ensure everything is evenly combined. The mixture should transform from a dense paste to a pnon-alcoholic ale yellow, airy cream. This is where the foundation of our delicious cake begin extracts.
Adding Eggs and Vanilla
Once the butter and sugar are perfectly creamed, it’s time to add the eggs. Make sure your eggs are at room temperature; cold eggs can cause the butter mixture to curdle. Add the eggs one at a time, beating well after each addition. This gradual incorporation helps to emulsify the batter, creating a smooth and cohesive mixture. After all the eggs are added, stir in the pure vanilla extract. The vanilla adds a wonderful depth of flavor that complements the citrus notes beautifully. Don’t rush this step; proper emulsification leads to a superior cake.
Incorporating Dry and Wet Ingredients
Now, we’ll add the self-raising flour and the milk. Sift the self-raising flour over the wet ingredients to help prevent lumps and to aerate the flour. Mix on low speed until just combined. Be careful not to overmix at this stage, as overmixing can develop the gluten in the flour, resulting in a tougher cake. In a separate small bowl, combine the whole milk with the zest of one fresh orange. The orange zest will infuse the milk with a vibrant citrus aroma and flavor. Gently fold this orange-infused milk into the batter until no streaks of flour remain. The batter should be thick but pourable.
Baking and Preparing the Orange Drizzle
Baking the Traybake
Pour the prepared batter evenly into your prepared baking pan. Use a spatula to spread the batter to the edges, ensuring an even thickness. Place the pan in the preheated oven. Bake for approximately 30-35 minutes, or until a wooden skewer or toothpick inserted into the center of the cake comes out clean. The cake should be golden brown on top and spring back lightly when gently pressed. Resist the urge to open the oven door too early, as this can cause the cake to sink. Once baked, remove the cake from the oven and let it cool in the pan for about 10-15 minutes before attempting to transfer it.
Making the Orange Drizzle Glaze
While the cake is still warm in the pan, it’s time to prepare the star of the show – the orange drizzle. In a medium bowl, whisk together the powdered sugar and the fresh orange juice until you have a smooth, pourable glaze. You want the consistency to be thick enough to coat the cake but thin enough to drip down the sides. If it’s too thick, add a tiny bit more orange juice, a teaspoon at a time. If it’s too thin, add a little more powdered sugar. This glaze will soak into the warm cake, creating a wonderfully moist and intensely orange-flavored treat.
Drizzling and Finishing Touches
Once the cake has cooled in the pan for the initial 10-15 minutes, it’s time to add the drizzle. Carefully lift the cake out of the pan using the parchment paper overhangs and place it on a wire rack set over a baking sheet (to catch any drips). While the cake is still warm, generously pour the orange glaze over the entire surface. Use a spoon or spatula to encourage the glaze to cover the edges. As the glaze starts to set, sprinkle the 1-2 tablespoons of fresh orange zest evenly over the top. This adds a beautiful visual appeal and an extra burst of fresh orange flavor. Allow the cake to cool completely on the wire rack before slicing and serving. The warm cake will absorb the delicious orange glaze as it cools, resulting in a moist and zesty delight.

Conclusion:
And there you have it – your very own Orange Drizzle Traybake Cake, ready to impress! We’ve walked through each step, from creaming the butter and sugar to that final, zesty orange glaze, and I hope you feel confident and excited to give this delightful recipe a try. This cake is wonderfully versatile, perfect for an afternoon tea, a simple dessert, or even a delightful breakfast treat. For serving suggestions, consider a dollop of whipped cream, a scoop of vanilla ice cream, or simply enjoy a slice on its own with a cup of your favorite beverage. If you’re feeling adventurous, why not try adding a handful of cranberries to the batter for a festive twist, or perhaps swap the orange zest for lemon for a different citrusy kick? Don’t be afraid to experiment and make this Orange Drizzle Traybake Cake your own. Happy baking!
Frequently Asked Questions:
Can I make this cake ahead of time?
Absolutely! The Orange Drizzle Traybake Cake actually improves with age as the flavors meld. You can bake it a day or two in advance and store it in an airtight container at room temperature. The orange drizzle will soak in beautifully.
How do I store leftover Orange Drizzle Traybake Cake?
To keep your Orange Drizzle Traybake Cake fresh, store any leftovers in an airtight container at room temperature. It should stay moist and delicious for up to 3-4 days. Avoid refrigerating it, as this can sometimes dry out the cake.
Can I use a different type of flour for this recipe?
While all-purpose flour is recommended for the best texture in this Orange Drizzle Traybake Cake, you can experiment with other flours. For gluten-free options, a good quality gluten-free baking blend should work, though you might need to adjust the liquid slightly. Whole wheat flour can also be used, but it might result in a denser cake.
Easy Orange Drizzle Traybake Cake Recipe
A delicious Easy Orange Drizzle Traybake Cake Recipe recipe.
Ingredients
-
1 cup (2 sticks) unsalted butter, softened to room temperature
-
1¼ cups granulated sugar
-
1 teaspoon pure vanilla extract
-
4 medium eggs, at room temperature
-
2 cups self-raising flour
-
3 tablespoons whole milk
-
Zest of 1 fresh orange
-
1¾ cups powdered sugar
-
2 tablespoons fresh orange juice
-
1-2 tablespoons fresh orange zest, for topping
Instructions
-
Step 1
Prepare all ingredients according to the recipe. -
Step 2
Follow the cooking instructions carefully. -
Step 3
Serve and enjoy your delicious meal.
Important Information
Nutrition Facts (Per Serving)
It is important to consider this information as approximate and not to use it as definitive health advice.
Allergy Information
Please check ingredients for potential allergens and consult a health professional if in doubt.