Peanut Butter Chocolate Chip Cookie Cups-Easy Recipe
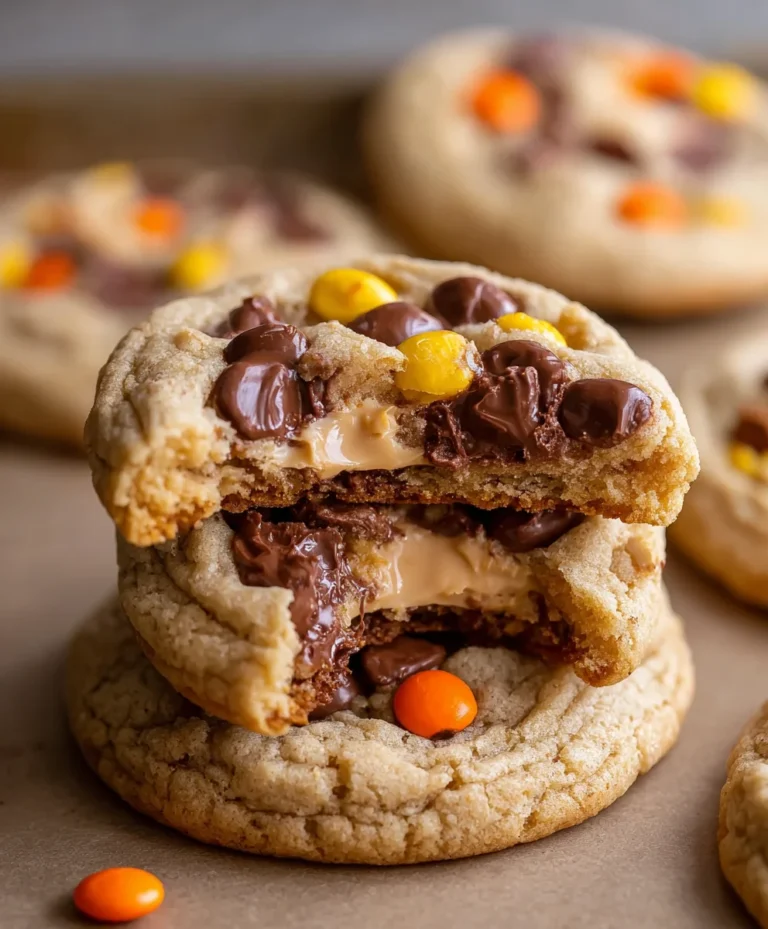
Peanut Butter Chocolate Chip Cookie Cups are the ultimate indulgence, aren’t they? There’s something undeniably magical about that perfect union of creamy, salty peanut butter and rich, decadent chocolate, all nestled within a soft, chewy cookie base. We all have those classic comfort foods that instantly bring a smile to our faces, and for many of us, a warm, gooey peanut butter chocolate chip cookie is high on that list. But what if I told you we could elevate that experience? These Peanut Butter Chocolate Chip Cookie Cups take everything you adore about the traditional cookie and transform it into a delightful, bite-sized masterpiece. They’re incredibly easy to make, offering that irresistible homemade charm, and the slightly thicker, fudgier texture of the cup is truly something special. Get ready to fall in love all over again with this iconic flavor combination.

Peanut Butter Chocolate Chip Cookie Cups
Get ready to experience cookie perfection like never before! Forget flat, boring cookies – these Peanut Butter Chocolate Chip Cookie Cups are designed to deliver a delightful combination of chewy cookie edges, soft centers, and an irresistible molten chocolate core. They’re perfect for dessert parties, a special treat, or just satisfying that intense craving. The beauty of cookie cups is their individual size and the ability to customize them with extra toppings. Imagin extracte biting into a warm, gooey cookie, the rich peanut butter mingling with melted chocolate, all cradled in a perfectly formed cup. It’s pure bliss!
Ingredients:
Instructions:
Phase 1: Preparing the Dough
Start by preheating your oven to 350 degrees Fahrenheit (175 degrees Celsius). This is a crucial step to ensure your cookie cups bake evenly and reach that perfect golden-brown perfection. While the oven heats, take a moment to prepare your muffin tin. Lightly grease the cups of a standard 12-cup muffin tin with butter or non-stick cooking spray. Alternatively, you can use muffin liners, though greasing the tin itself often helps achieve a slightly crispier edge on the cookie cup, which is delightful. Some bakers even prefer to use a mini muffin tin for bite-sized treats, but a standard size yields a satisfyingly substantial cup.
In a medium-sized bowl, whisk together your dry ingredients: 1¼ cups of all-purpose flour, ½ teaspoon of baking soda, and ¼ teaspoon of salt. Whisking these together ensures the leavening agent (baking soda) and salt are evenly distributed throughout the flour, which prevents pockets of saltiness or uneven rising in your finished cookies. Set this bowl aside for now; we’ll combine it with the wet ingredients shortly.
In a large mixing bowl, cream together ½ cup of softened unsalted butter, ½ cup of brown sugar, and ¼ cup of granulated sugar. You can use an electric mixer for this step, which makes it much easier and faster, or a sturdy whisk and some elbow grease if you’re up for a workout! The key here is to beat them until the mixture is light and fluffy. This process incorporates air into the butter and sugar, contributing to the cookie’s texture. Gradually beat in ½ cup of peanut butter until well combined. Now, stir in 1 teaspoon of vanilla extract and 1 large egg. Mix until everything is just combined, being careful not to overmix at this stage. Overmixing can develop the gluten in the flour too much, leading to tough cookies.
Now, it’s time to combine your dry and wet ingredients. Gradually add the dry flour mixture to the wet ingredients, mixing on low speed or with a spatula until just incorporated. Be sure to scrape down the sides of the bowl to ensure all the flour is mixed in. Overmixing here will make your cookie cups tough, so stop as soon as you no longer see streaks of flour. Gently fold in ¾ cup of chocolate chips. This is where the magic starts to happen! The chocolate chips will be distributed throughout the cookie dough, promising delicious pockets of melted chocolate in every bite.
Phase 2: Baking and Finishing
To form your cookie cups, evenly divide the dough among the 12 prepared muffin cups. You can use a cookie scoop or two spoons to do this. Press the dough down slightly into the bottom and up the sides of each muffin cup, creating a “cup” shape. This is important because the dough will puff up as it bakes, and you want to ensure there’s a good space in the middle for those decadent toppings later. I like to use my thumb or the back of a small spoon to create a well or indentation in the center of each dough ball before baking. Sprinkle the remaining ¼ cup of chocolate chips evenly over the tops of the dough in each muffin cup. This will give you a lovely, melted chocolate topping once they’re baked.
Bake for 12-15 minutes, or until the edges of the cookie cups are golden brown and the centers are set but still look slightly soft. The exact baking time will depend on your oven, so keep an eye on them. You don’t want to overbake them, as they will continue to cook slightly as they cool, and you’re aiming for a chewy center. Once baked, remove the muffin tin from the oven and let the cookie cups cool in the tin for about 5-10 minutes. This cooling period is crucial for them to firm up enough to be removed without breaking.
After the initial cooling in the tin, carefully remove the cookie cups from the muffin tin and transfer them to a wire rack to cool completely. This is where the true cookie cup experience comes to life! Once they are fully cooled, you can begin extract the best part: decorating! Place a scoop of your favorite vanilla ice cream into the center of each cookie cup. Then, generously drizzle with melted chocolate and caramel sauce. The warmth of the cookie cup will slightly melt the ice cream, creating an incredibly decadent dessert. Serve immediately and enjoy the delightful symphony of flavors and textures!

Conclusion:
There you have it! These peanut butter chocolate chip cookie cups are an absolute dream for any cookie lover. What makes them truly special is their perfect balance of chewy peanut butter cookie edges and a soft, gooey chocolate chip center, all baked into adorable, bite-sized cups. They’re incredibly easy to whip up, making them ideal for a quick treat or a show-stopping dessert for any occasion. I love serving these warm, straight from the oven, with a cold glass of milk – pure bliss! They’re also fantastic slightly cooled, offering a delightful chegrape juicess that’s utterly irresistible. Don’t be afraid to get creative with variations! Try adding a sprinkle of sea salt on top before baking for an extra flavor pop, or stir in some chopped pretzels for a sweet and salty crunch. You could even swirl in a tablespoon of your favorite jam into the dough for a fruity twist. I genuinely encourage you to give these peanut butter chocolate chip cookie cups a try; I’m confident they’ll become a new favorite in your recipe repertoire. Get ready for rave reviews!
Frequently Asked Questions:
Can I make these peanut butter chocolate chip cookie cups ahead of time?
Yes, absolutely! You can prepare the dough and store it in an airtight container in the refrigerator for up to 3 days. When you’re ready to bake, simply scoop and bake as directed. You can also bake them fully and store them in an airtight container at room temperature for up to 2-3 days. For longer storage, freeze the baked cookie cups in a single layer on a baking sheet until firm, then transfer them to a freezer-safe bag or container.
What if I don’t have a muffin tin?
No problem! While a muffin tin is ideal for creating the “cup” shape, you can still make these as regular cookies. Simply drop rounded spoonfuls of dough onto a parchment-lined baking sheet, leaving about 2 inches between each cookie. They won’t have the distinct cup shape, but they will still be incredibly delicious peanut butter chocolate chip cookies!
My cookie cups spread too much. What did I do wrong?
There are a couple of reasons this might happen. Ensure your butter and peanut butter are at room temperature but not melted. Over-creaming the butter and sugar can also incorporate too much air, leading to spreading. Also, make sure you’re not overfilling the muffin cups; about two-thirds full is usually perfect. Chilling the dough for about 30 minutes before baking can also help prevent excessive spreading.
Peanut Butter Chocolate Chip Cookie Cups
Delicious and easy peanut butter chocolate chip cookie cups, perfect for a sweet treat. These are baked in muffin tins and can be served with ice cream and drizzles.
Ingredients
-
1¼ cups all-purpose flour
-
½ teaspoon baking soda
-
¼ teaspoon salt
-
½ cup unsalted butter, softened
-
½ cup brown sugar
-
¼ cup granulated sugar
-
½ cup peanut butter (creamy or chunky)
-
1 teaspoon vanilla extract
-
1 large egg
-
1 cup chocolate chips, divided (¾ cup for mixing in, ¼ cup for topping)
-
Vanilla ice cream
-
Melted chocolate for drizzling
-
Caramel sauce for drizzling
Instructions
-
Step 1
Preheat your oven to 350°F (175°C). Grease a muffin tin. -
Step 2
In a medium bowl, whisk together the flour, baking soda, and salt. -
Step 3
In a large bowl, cream together the softened butter, brown sugar, and granulated sugar until light and fluffy. -
Step 4
Beat in the peanut butter and vanilla extract until well combined. -
Step 5
Add the egg and beat until incorporated. -
Step 6
Gradually add the dry ingredients to the wet ingredients, mixing until just combined. Stir in ¾ cup of chocolate chips. -
Step 7
Press about 2 tablespoons of dough into each muffin cup, creating a well in the center. -
Step 8
Bake for 10-12 minutes, or until the edges are lightly golden. -
Step 9
Remove from oven and immediately press the remaining ¼ cup chocolate chips into the tops of the warm cookie cups. -
Step 10
Let cool in the muffin tin for 5 minutes before transferring to a wire rack to cool completely. Serve with vanilla ice cream, melted chocolate, and caramel sauce for drizzling.
Important Information
Nutrition Facts (Per Serving)
It is important to consider this information as approximate and not to use it as definitive health advice.
Allergy Information
Please check ingredients for potential allergens and consult a health professional if in doubt.