Easy Delicious Cheese Danishes – Quick Recipe
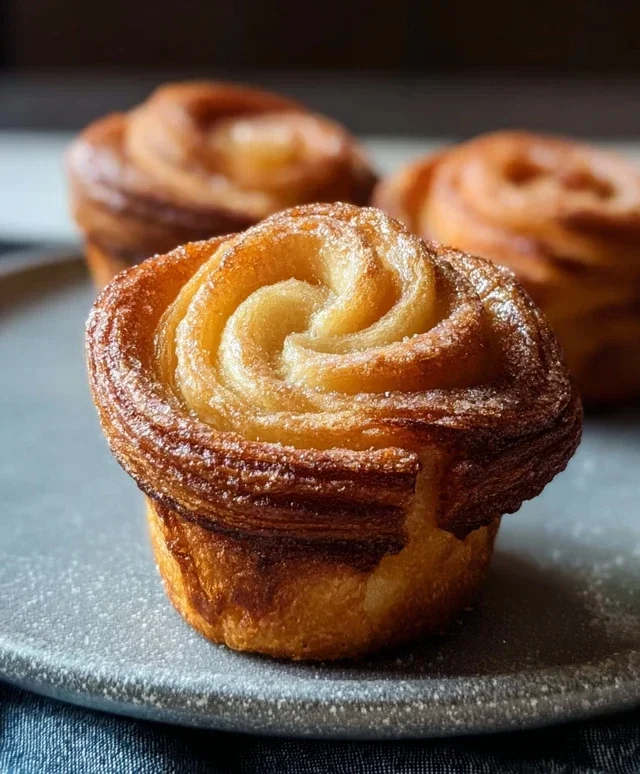
Cheese Danishes are more than just a pastry; they’re a little piece of heaven, a delightful indulgence that whispers of weekend mornings and cozy cafes. What is it about these flaky, cream-filled delights that captivates so many? Perhaps it’s the irresistible contrast between the shatteringly crisp, buttery layers of puff pastry and the lusciously smooth, subtly sweet cream cheese filling. It’s that perfect balance of textures and flavors that makes a truly exceptional Cheese Danish. They’re a universally beloved treat, perfect for a leisurely breakfast, an afternoon pick-me-up, or even a simple yet elegant dessert. This recipe aims to capture that magic, guiding you through creating your own bakery-worthy Cheese Danishes right in your own kitchen, ensuring every bite is as delightful as the last.

Ingredients:
- 2 tubes (8 oz each) refrigerated crescent rolls
- 2 tablespoons salted butter, melted
- 8 tablespoons light brown sugar
- 1 package (8 oz) cream cheese, softened to room temperature
- ¼ cup granulated white sugar
- 1 teaspoon pure vanilla extract (for the cream cheese filling)
- ½ cup powdered sugar
- 1 teaspoon pure vanilla extract (for the glaze)
- 4 teaspoons milk
Preparing the Filling and Base
Step 1: Preheat Your Oven and Prepare the Baking Sheets
First things first, let’s get our oven ready for these delicious Cheese Danishes. Preheat your oven to 375°F (190°C). While the oven is heating up, grab a couple of baking sheets and line them with parchment paper or silicone baking mats. This step is crucial for easy cleanup and to prevent any sticking, ensuring your danishes come off the pan beautifully. Make sure the baking sheets are large enough to accommodate the danishes without them touching, as they will expand slightly as they bake.
Step 2: Crafting the Creamy Cheese Filling
Now, let’s move on to the star of our Cheese Danishes: the creamy filling. In a medium-sized bowl, add your softened cream cheese. It’s really important that the cream cheese is at room temperature for this step; cold cream cheese can be lumpy and difficult to mix smoothly. Add the ¼ cup of granulated white sugar and 1 teaspoon of pure vanilla extract to the cream cheese. Using an electric mixer (handheld or stand mixer with a paddle attachment) or a sturdy whisk, beat these ingredients together until the mixture is completely smooth, creamy, and well combined. There should be no streaks of cream cheese or sugar visible. Set this glorious filling aside for now.
Assembling the Cheese Danishes
Step 3: Preparing the Crescent Roll Bases
Unroll your two tubes of crescent rolls onto a clean, lightly floured surface. You’ll notice that each tube contains several pre-portioned triangles. Carefully separate these triangles. Instead of unfolding them fully, we want to keep them in their triangular shape. For each danish, take one crescent roll triangle and gently press the perforated seams together to seal them. You want to create a solid base for our filling. You can do this by pinching the edges firmly together. Place these senon-alcoholic aled triangles onto your prepared baking sheets, leaving a little space between each one.
Step 4: Adding the Filling and Brown Sugar Mixture
Now it’s time to assemble. Take about a tablespoon of your prepared cream cheese filling and spread it evenly over the wider, base end of each crescent roll triangle. Don’t go all the way to the very edges, as you want to leave a small border. Next, in a separate small bowl, combine the 2 tablespoons of melted salted butter with the 8 tablespoons of light brown sugar. Stir this together until it forms a moist, crum extractbly mixture. Sprinkle a generous amount of this brown sugar mixture over the cream cheese filling on each danish. This topping will caramelize beautifully in the oven, adding a delightful crunch and sweetness.
Baking and Finishing Touches
Step 5: Baking the Cheese Danishes to Golden Perfection
Carefully place the baking sheets into your preheated oven. Bake for approximately 12 to 15 minutes, or until the crescent rolls are puffed up, golden brown, and the edges are crisp. Keep a close eye on them during the last few minutes, as ovens can vary. You’re looking for that perfect balance of cooked dough and slightly caramelized brown sugar. Once they are beautifully golden, remove the baking sheets from the oven. Let the Cheese Danishes cool on the baking sheets for about 5 minutes before transferring them to a wire rack to cool further.
Step 6: Creating the Sweet Vanilla Glaze
While your danishes are cooling slightly, let’s whip up the simple yet elegant glaze that will take them to the next level. In a small bowl, whisk together the ½ cup of powdered sugar, the remaining 1 teaspoon of pure vanilla extract, and the 4 teaspoons of milk. Start with the milk and gradually add it to the powdered sugar and vanilla, whisking continuously. You’re aiming for a smooth, drizzly consistency. If the glaze is too thick, add a tiny bit more milk (just a drop or two at a time). If it’s too thin, add a little more powdered sugar. Once the danishes have cooled enough to handle but are still slightly warm, use a spoon or a whisk to drizzle this delicious glaze over the tops of each Cheese Danish. Allow the glaze to set for a few minutes before serving. Enjoy these warm, gooey, and utterly irresistible treats!

Conclusion:
And there you have it – your very own delicious batch of homemade Cheese Danishes! We hope you’ve enjoyed this journey of creating these delightful pastries. The combination of flaky puff pastry, creamy, sweet cheese filling, and that beautiful golden-brown finish is truly irresistible. These Cheese Danishes are perfect for a special breakfast treat, an afternoon pick-me-up with your favorite tea or coffee, or even as a simple yet elegant dessert.
To serve, allow them to cool slightly before indulgin extractg. They are wonderful on their own, but a dusting of powdered sugar or a drizzle of a simple lemon glaze can elevate them even further. For variations, feel free to add a pinch of cinnamon to your cheese filling, or perhaps some fresh berries like blueberries or raspberries mixed in. Don’t be afraid to experiment with different extracts, like almond or vanilla, to personalize your Cheese Danishes.
We encourage you to try this recipe and share it with your loved ones. The satisfaction of making something so delicious from scratch is incredibly rewarding. Happy baking!
Frequently Asked Questions:
Can I make the cheese filling ahead of time?
Yes, absolutely! You can prepare the cheese filling up to 2-3 days in advance and store it in an airtight container in the refrigerator. This can save you time on the day you plan to assemble and bake your Cheese Danishes.
My puff pastry isn’t puffing up properly. What could be wrong?
Several factors can affect puff pastry. Ensure your pastry is kept very cold throughout the process – from storage to handling. If it gets too warm, the butter layers will melt instead of steaming and creating those distinct layers. Also, make sure your oven is preheated to the correct temperature before baking.
Can I freeze the baked Cheese Danishes?
While they are best enjoyed fresh, you can freeze baked and cooled Cheese Danishes. Wrap them individually in plastic wrap and then place them in a freezer-safe bag or container. Reheat them gently in a low oven (around 300°F or 150°C) for a few minutes until warmed through and the pastry is crisp again.
Easy Delicious Cheese Danishes – Quick Recipe
Quick and easy cheese danishes made with crescent rolls, a creamy cream cheese filling, and a sweet vanilla glaze. Perfect for a weekend treat or a quick breakfast.
Ingredients
-
2 tubes (8 oz each) refrigerated crescent rolls
-
2 tablespoons salted butter, melted
-
8 tablespoons light brown sugar
-
1 package (8 oz) cream cheese, softened to room temperature
-
¼ cup granulated white sugar
-
1 teaspoon pure vanilla extract (for filling)
-
½ cup powdered sugar
-
1 teaspoon pure vanilla extract (for glaze)
-
4 teaspoons milk
Instructions
-
Step 1
Preheat your oven to 375°F (190°C). Line baking sheets with parchment paper or silicone baking mats. -
Step 2
In a medium bowl, beat softened cream cheese with ¼ cup granulated white sugar and 1 teaspoon vanilla extract until smooth and creamy. -
Step 3
Unroll crescent rolls, separate triangles, and pinch seams together to form solid bases. Place on prepared baking sheets. -
Step 4
Spread about a tablespoon of cream cheese filling onto the wider end of each crescent roll base. In a small bowl, mix melted butter and 8 tablespoons light brown sugar until crumbly. Sprinkle over the cream cheese filling. -
Step 5
Bake for 12 to 15 minutes, or until golden brown and puffed. Let cool on baking sheets for 5 minutes before transferring to a wire rack. -
Step 6
While danishes cool, whisk together ½ cup powdered sugar, 1 teaspoon vanilla extract, and 4 teaspoons milk to create a drizzly glaze. Add milk or powdered sugar as needed for desired consistency. Drizzle over danishes and let set before serving.
Important Information
Nutrition Facts (Per Serving)
It is important to consider this information as approximate and not to use it as definitive health advice.
Allergy Information
Please check ingredients for potential allergens and consult a health professional if in doubt.