Easy Lemon Blueberry Sourdough Bread Recipe-Taste
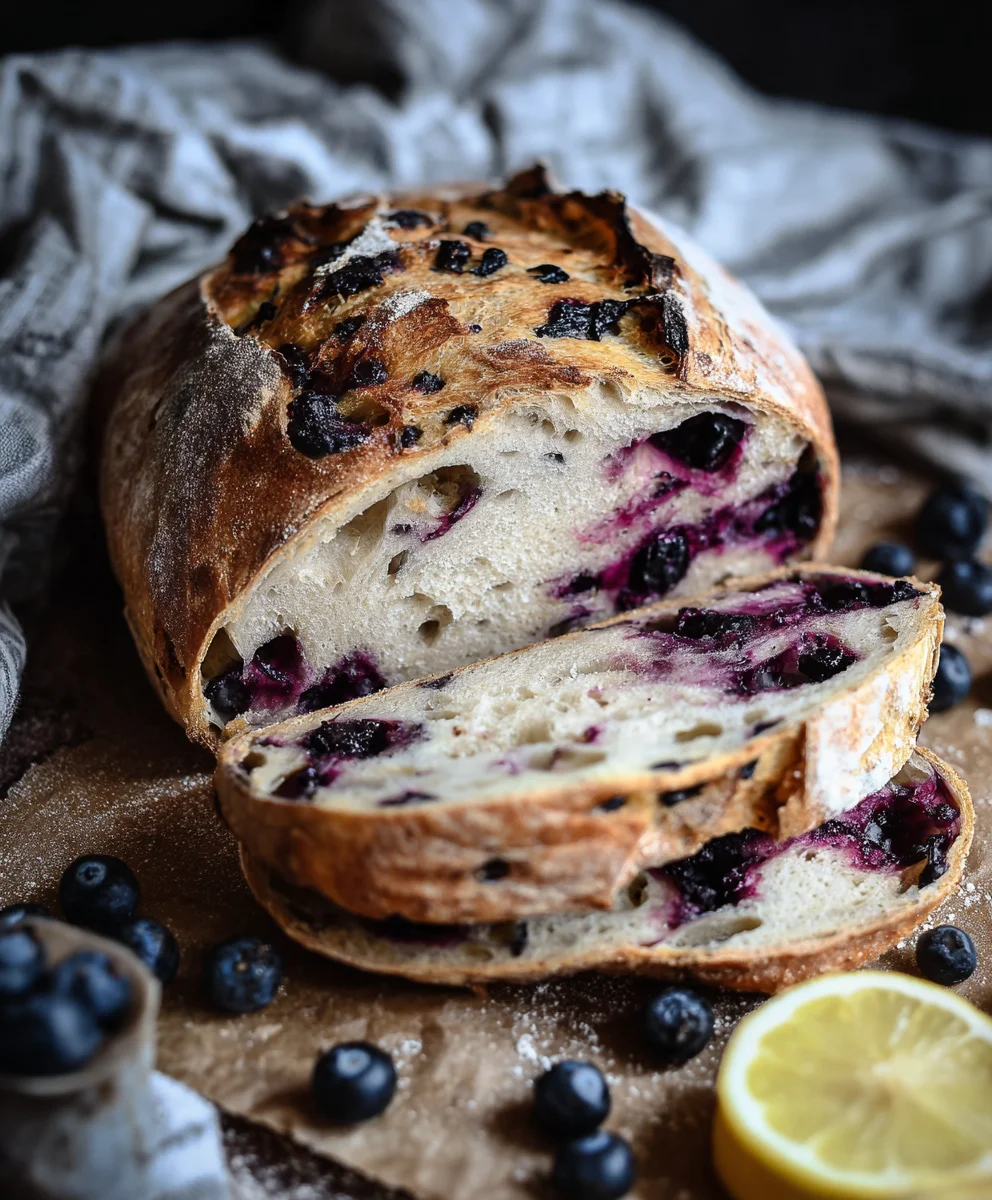
Lemon Blueberry Sourdough Bread Recipe is a delightful fusion of bright citrus and sweet berries, all elevated by the tangy complexity of sourdough. Imagin extracte the irresistible aroma filling your kitchen as this beautiful loaf bakes – a testament to the magic that happens when simple, quality ingredients meet patient fermentation. It’s no wonder this particular sourdough creation has captured so many hearts. The classic comfort of homemade bread is amplified here, offering a tender crum extractb, a satisfying chew, and that signature sourdough tang that’s utterly addictive. What truly sets this Lemon Blueberry Sourdough Bread Recipe apart is the perfect harmony of flavors: the sharp, zesty notes of fresh lemon zest cut through the sweetness of plump blueberries, creating a taste sensation that’s both refreshing and comforting. Whether you’re a seasoned baker orgin extractst beginning your sourdough journey, this recipe promises a truly rewarding and delicious outcome that will have everyone asking for seconds.
Ingredients:
- 50g active sourdough starter
- 350g water
- 500g bread flour
- 11g salt
- 150g fresh blueberries
- Zest of 1 lemon
- 8 Tablespoons butter, room temperature (113g)
- 1/2 cup fresh blueberries, mashed (75g)
- 2 Tablespoons honey (45g)
- A pinch of salt
Sourdough Dough Preparation
Mixing the Dough
- In a large mixing bowl, combine the active sourdough starter and 350g of water. Stir gently until the starter is mostly dispersed in the water. This is your levain, ready to work its magic.
- Add the 500g of bread flour and 11g of salt to the bowl. Use a spatula or your hands to mix everything together until there are no dry pockets of flour remaining. The dough will be shaggy and a bit sticky at this stage, which is perfectly normal. Don’t be tempted to add more flour at this point; we’ll handle hydration later.
- Cover the bowl with a damp cloth or plastic wrap and let it rest for 30 minutes. This resting period, known as autolyse, allows the flour to fully hydrate and the gluten development to begin extract without any kneading. It’s a crucial step for a lighter, more open crum extractb in your final loaf.
Developing the Gluten
- After the autolyse period, it’s time to start developing the gluten structure through a series of stretch-and-folds. With damp hands, reach under one side of the dough, gently stretch it upwards, and fold it over the rest of the dough. Rotate the bowl 90 degrees and repeat this stretching and folding motion four times in total, completing one full set of folds. This technique gradually builds strength and elasticity in the dough.
- Cover the bowl again and let it rest for another 30 minutes. Repeat the stretch-and-fold process every 30 minutes for a total of four sets of folds over two hours. You’ll notice the dough becoming smoother, more elastic, and less sticky with each set of folds. It should start to hold its shape better.
- Once you’ve completed all the stretch-and-folds, place the bowl in a warm spot (around 75-78°F or 24-26°C is ideal) and let the dough ferment until it has increased in volume by about 50-75% and shows signs of aeration, such as bubbles on the surface. This can take anywhere from 4 to 8 hours, depending on your room temperature and starter activity.
Adding the Flavorings
- Once the dough has reached its bulk fermentation, it’s time to incorporate the delicious lemon and blueberry flavors. Gently tip the dough out onto a lightly floured work surface. Be careful not to degas it too much.
- Sprinkle the zest of one lemon evenly over the surface of the dough. Then, scatter the 150g of fresh blueberries over the zest.
- Now, it’s time to gently fold the blueberries and lemon zest into the dough. Use your hands to carefully scoop and fold the dough over itself, trying to distribute the additions as evenly as possible without crushing the blueberries too much. This might take a few minutes and a couple of gentle folds to get them incorporated.
Shaping and Baking
Pre-shaping and Final Proofing
- Once the flavorings are incorporated, gently form the dough into a round shape (a boule) by pulling the edges towards the center and then flipping it over so the seam is underneath. Let it rest, uncovered, on your work surface for about 20-30 minutes. This brief rest allows the gluten to relax before the final shaping.
- After the rest, it’s time for the final shaping. Depending on whether you want a boule or a batard, shape the dough accordingly. For a boule, gently cup your hands around the dough, pulling it towards you and tucking the edges underneath to create surface tension. For a batard, fold the top third down, then the bottom third up, and then bring the two sides together and roll to seal.
- Carefully place the shaped dough into a well-floured proofing basket (banneton) or a bowl lined with a floured tea towel, seam-side up. Cover the basket with plastic wrap or a damp cloth and place it in the refrigerator for an overnight cold proof. This slow, cold fermentation in the fridge develops a deeper flavor and makes the dough easier to score and handle. Aim for 12-18 hours of refrigeration.
Baking the Loaf
- When you are ready to bake, preheat your oven to 475°F (245°C) with a Dutch oven or baking vessel inside for at least 30 minutes. It’s essential for the Dutch oven to be scorching hot to achieve that perfect oven spring and crispy crust.
- Once the oven and Dutch oven are fully preheated, carefully remove the Dutch oven from the oven. Gently invert your cold-proofed dough directly into the hot Dutch oven. If you used a proofing basket, the dough should release easily. If it sticks a little, you can tap the bottom of the basket.
- Using a sharp blade or scoring lame, carefully score the top of the dough. A simple slash or a more decorative pattern will work. Scoring allows the dough to expand evenly during baking. Quickly put the lid back on the Dutch oven and carefully place it back into the hot oven.
- Bake with the lid on for 20 minutes. After 20 minutes, carefully remove the lid. You’ll see the loaf has sprung beautifully and is starting to color. Reduce the oven temperature to 450°F (230°C). Continue baking with the lid off for another 20-25 minutes, or until the crust is a deep golden brown and the internal temperature of the bread reaches around 200-210°F (93-99°C) when tested with an instant-read thermometer.
Lemon Blueberry Butter Spread
Making the Compound Butter
- While the bread is cooling, prepare the delightful lemon blueberry butter spread. In a medium bowl, combine the 8 tablespoons of softened butter, 1/2 cup of mashed blueberries, 2 tablespoons of honey, and a pinch of salt.
- Using a fork or a spatula, vigorously mix all the ingredients together until they are well combined and the mixture has a uniform color and consistency. Ensure the mashed blueberries are evenly distributed throughout the butter.
- Once mixed, you can either spoon the spread into a small serving dish or, for a more elegant presentation, roll the butter mixture into a log shape using parchment paper, twisting the ends to secure it, and then refrigerate it until firm. This compound butter is the perfect accompaniment to your freshly baked Lemon Blueberry Sourdough Bread.
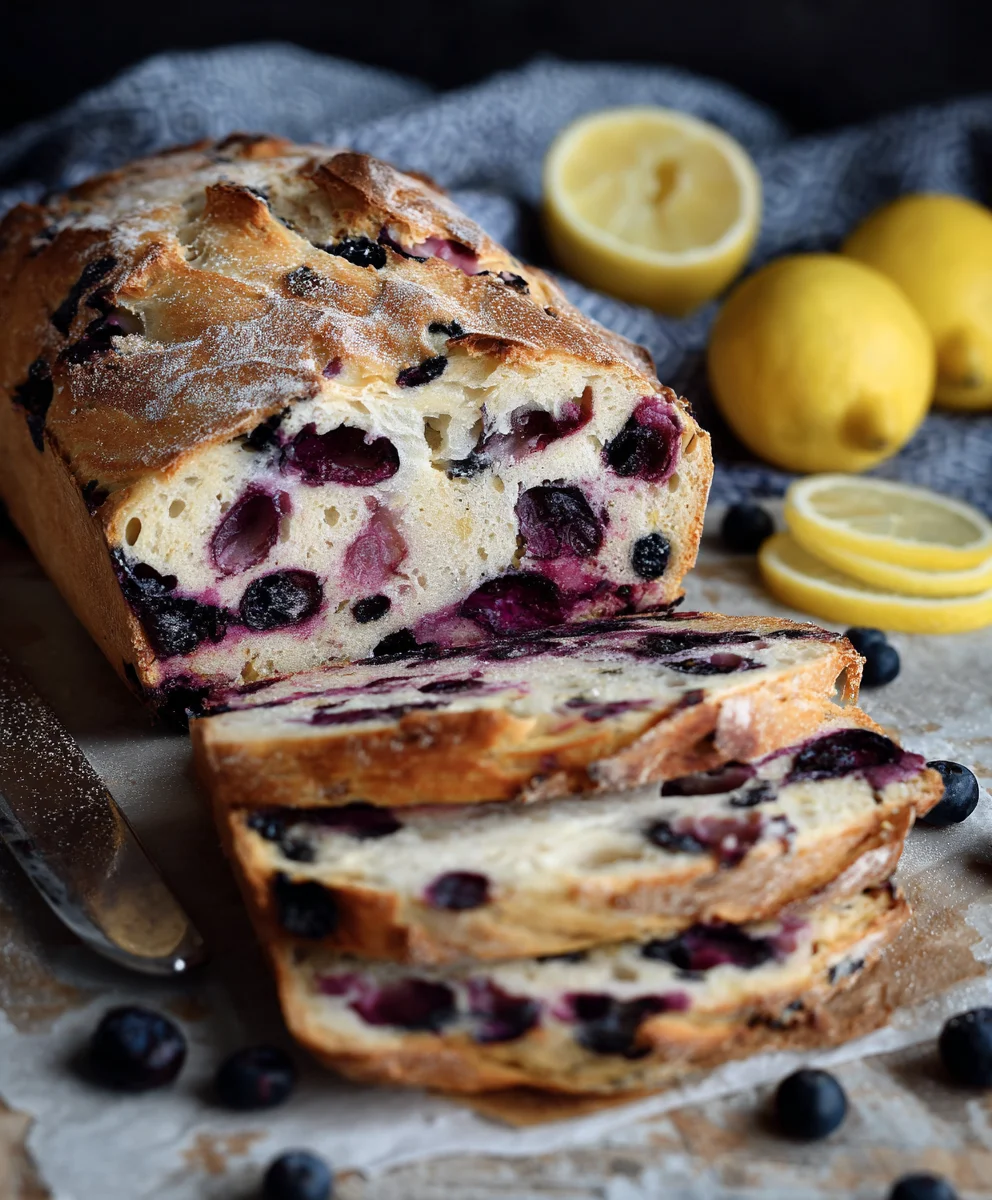
Conclusion:
You’ve now learned how to create the most delightful Lemon Blueberry Sourdough Bread Recipe! This recipe balances the tangy depth of sourdough with the bright, zesty notes of lemon and the sweet burst of blueberries, resulting in a loaf that’s both complex and incredibly comforting. Whether you’re a seasoned sourdough baker or just venturing into the world of natural leavening, this recipe offers a rewarding and delicious experience. We hope you enjoy the process as much as you’ll love the final product.
This versatile loaf is perfect served simply with a smear of butter, or it can be elevated by toasting it and topping it with cream cheese, a dollop of Greek yogurt, or a drizzle of honey. For a more dessert-like experience, consider serving it alongside fresh berries or a scoop of vanilla ice cream. Don’t be afraid to experiment with variations! You could try adding a pinch of cardamom for warmth, a splash of lemon extract for intensified citrus flavor, or even a handful of chopped almonds for added crunch. The possibilities are truly endless. Happy baking, and may your Lemon Blueberry Sourdough Bread Recipe adventures be filled with delicious success!
Frequently Asked Questions:
Q1: My sourdough starter isn’t very active. Can I still make this Lemon Blueberry Sourdough Bread Recipe?
While an active and bubbly sourdough starter is ideal for the best rise and flavor development, you can still proceed with this Lemon Blueberry Sourdough Bread Recipe if your starter is moderately active. You might find that the fermentation time needs to be extended slightly. Ensure your starter is fed regularly and looks lively before you begin extract. If it’s completely sluggish, consider giving it a few extra feedings to boost its activity.
Q2: Can I use frozen blueberries instead of fresh for this Lemon Blueberry Sourdough Bread Recipe?
Yes, you can absolutely use frozen blueberries! When using frozen blueberries, it’s a good idea to toss them in a tablespoon or two of flour before adding them to the dough. This helps to prevent them from bleeding too much color into the dough and also aids in their even distribution. Avoid thawing them completely before adding them, as this can lead to a mushier texture and more color bleed.
Easy Lemon Blueberry Sourdough Bread
A delightful and easy recipe for Lemon Blueberry Sourdough Bread, perfect for any occasion.
Ingredients
-
50g active sourdough starter
-
350g water
-
500g bread flour
-
11g salt
-
150g fresh blueberries
-
Zest of 1 lemon
-
8 Tablespoons butter, room temperature (113g)
-
1/2 cup fresh blueberries, mashed (75g)
-
2 Tablespoons honey (45g)
-
A pinch of salt
Instructions
-
Step 1
In a large mixing bowl, combine the active sourdough starter and 350g of water. Stir gently until the starter is mostly dispersed in the water. Add the 500g of bread flour and 11g of salt. Mix until no dry pockets of flour remain. Cover and rest for 30 minutes (autolyse). -
Step 2
Perform stretch-and-folds every 30 minutes for a total of four sets over two hours. After the final folds, let the dough ferment in a warm spot until it has increased in volume by about 50-75% (4-8 hours). -
Step 3
Gently tip the dough onto a lightly floured surface. Sprinkle the lemon zest and 150g of fresh blueberries over the dough. Gently fold them in until evenly distributed. -
Step 4
Gently form the dough into a round shape and let it rest for 20-30 minutes. Then, perform the final shaping into a boule or batard. Place the shaped dough seam-side up in a well-floured proofing basket or lined bowl. -
Step 5
Cover and refrigerate for an overnight cold proof (12-18 hours). -
Step 6
Preheat oven to 475°F (245°C) with a Dutch oven inside for at least 30 minutes. Carefully invert the cold-proofed dough into the hot Dutch oven. Score the top of the dough. -
Step 7
Bake with the lid on for 20 minutes. Remove the lid, reduce oven temperature to 450°F (230°C), and continue baking for another 20-25 minutes, or until deep golden brown and the internal temperature reaches 200-210°F (93-99°C). -
Step 8
While the bread cools, prepare the compound butter: Combine 8 tablespoons of softened butter, 1/2 cup mashed blueberries, 2 tablespoons honey, and a pinch of salt. Mix until well combined.
Important Information
Nutrition Facts (Per Serving)
It is important to consider this information as approximate and not to use it as definitive health advice.
Allergy Information
Please check ingredients for potential allergens and consult a health professional if in doubt.