Strawberry Banana Pudding Cheesecake Recipe
Strawberry Banana Pudding Cheesecake is a dream come true for dessert lovers, a symphony of flavors and textures that will transport you to pure bliss. Imagin extracte the creamy, dreamy goodness of classic banana pudding, swirled with sweet, vibrant strawberry sauce, all cradled within the rich, decadent embrace of a perfectly baked cheesecake. This isn’t just any dessert; it’s an experience. We adore this Strawberry Banana Pudding Cheesecake because it expertly balances familiar comforts with an exciting, elevated twist. The smooth custard, the sweet, tender banana slices, the bright burst of strawberries, and the velvety cheesecake base all come together to create a harmonious masterpiece. It’s the perfect dessert for celebrations, a comforting treat after a long week, or simply when you crave something utterly unforgettable. Prepare to fall in love with this delightful creation!
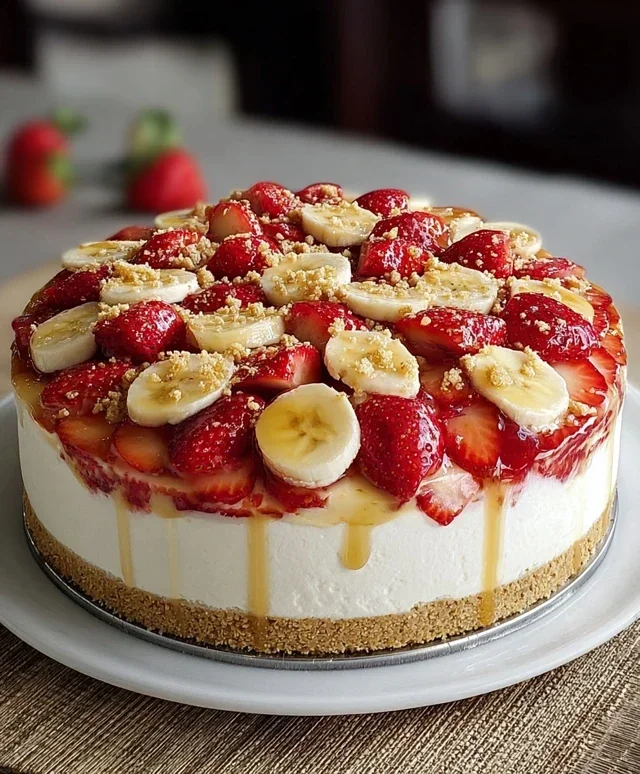
Strawberry Banana Pudding Cheesecake
Get ready for a dessert that’s a true symphony of flavors and textures! This Strawberry Banana Pudding Cheesecake is a dream come true for anyone who loves classic comfort desserts. Imagin extracte a creamy, tangy cheesecake base, infused with the sweet essence of ripe bananas, layered with a luscious banana pudding, and topped with a vibrant, slightly tart strawberry compote. The buttery vanilla wafer crust adds a delightful crunch that perfectly complements the smooth fillings. This recipe takes a little time, but the result is absolutely worth every moment. It’s the perfect showstopper for holidays, parties, or just a special weekend treat.
Ingredients:
Getting Started: The Vanilla Wafer Crust
The foundation of our incredible cheesecake is a simple yet delicious vanilla wafer crust. To begin extract, preheat your oven to 350°F (175°C). This initial baking step is crucial for creating a firm crust that won’t crum extractble when you slice into the finished cheesecake. In a medium bowl, combine the 2 cups of crushed vanilla wafers and ¼ cup of granulated sugar. Ensure the wafers are finely crushed; you can achieve this by placing them in a zip-top bag and using a rolling pin, or by using a food processor. Then, pour in the ½ cup of melted unsalted butter. Stir everything together until the crum extractbs are evenly moistened and resemble wet sand. Press this mixture firmly into the bottom and slightly up the sides of a 9-inch springform pan. A flat-bottomed glass or the bottom of a measuring cup works perfectly for pressing the crum extractbs evenly. Once pressed, bake the crust for 8-10 minutes, or until lightly golden brown. This helps to set the crust and release its buttery aroma. Remove from the oven and let it cool completely while you prepare the cheesecake filling.
Crafting the Creamy Cheesecake Filling
Now, let’s create the heart of our dessert: the cheesecake filling. In a large bowl, beat the 2 (8 oz) blocks of softened cream cheese with the ½ cup of granulated sugar until smooth and creamy. It’s important that the cream cheese is truly softened; this will prevent any lumps and ensure a silky texture. You can achieve this by leaving it at room temperature for about an hour or by gently microwaving it in short bursts. Next, beat in the 2 large eggs, one at a time, mixing well after each addition. Overmixing after the eggs are added can introduce too much air, which can lead to cracking. Stir in the 1 tsp of vanilla extract and the 1 cup of mashed ripe bananas. For the best banana flavor, use very ripe bananas – the spottier, the better! Finally, gently fold in the ½ cup of sour cream until just combined. The sour cream adds a delightful tangin extractess and extra richness to the cheesecake. Pour this luscious filling over the cooled vanilla wafer crust.
The Luscious Banana Pudding Layer
This next step brings in that irresistible banana pudding element that makes this cheesecake so unique. In a separate bowl, whisk together the 1 box (3.4 oz) of banana pudding mix with the ½ cup of heavy cream. Whisk vigorously until the mixture begin extracts to thicken and holds soft peaks. This pudding mixture will form a wonderful, creamy layer that perfectly complements the cheesecake base. Once the pudding mixture is ready, gently dollop it over the cheesecake filling. Don’t worry about spreading it perfectly; a rustic dollop is fine, as it will spread slightly as the cheesecake bakes.
Baking the Cheesecake to Perfection
Baking a cheesecake requires a little patience and care to prevent cracks. To achieve a creamy, evenly baked cheesecake, we’ll use a water bath. Wrap the outside of your springform pan tightly with several layers of heavy-duty aluminum foil to prevent any water from seeping in. Place the foil-wrapped springform pan into a larger baking pan. Carefully pour hot water into the larger pan, enough to come about halfway up the sides of the springform pan. This water bath creates a humid environment, which allows the cheesecake to bake gently and evenly, minimizing the risk of cracking. Carefully place the entire setup into your preheated 350°F (175°C) oven. Bake for 50-60 minutes, or until the edges of the cheesecake are set but the center still has a slight wobble.
Cooling and Chilling for Ultimate Flavor
The cooling process is just as important as the baking! Once the cheesecake has baked, turn off the oven and crack the oven door open slightly. Let the cheesecake cool in the oven for another hour. This gradual cooling prevents drastic temperature changes that can cause cracking. After the hour in the oven, remove the cheesecake from the water bath and carefully remove the foil. Let it cool completely on a wire rack at room temperature. Once it has reached room temperature, cover it loosely with plastic wrap and refrigerate for at least 6 hours, or preferably overnight. This chilling time allows the cheesecake to fully set and the flavors to meld together beautifully.
Whipping Up the Quick Strawberry Topping
While the cheesecake chills, we’ll prepare a bright and flavorful strawberry topping. In a small saucepan, combine the 1 cup of diced fresh strawberries, ¼ cup of granulated sugar, and 1 tbsp of lemon juice. The lemon juice enhances the strawberry flavor and adds a touch of brightness. Cook this mixture over medium heat, stirring occasionally, until the strawberries begin extract to soften and release their juices, about 5-7 minutes. In a small bowl, whisk together the cornstarch and water to create a slurry. Pour this slurry into the simmering strawberry mixture, stirring constantly. Continue to cook for another 1-2 minutes, or until the topping has thickened. Remove from heat and let it cool completely. Once the cheesecake is thoroughly chilled, carefully remove the sides of the springform pan. Spoon the cooled strawberry topping over the cheesecake just before serving. This dessert is truly a celebration of sweet, creamy, and fruity goodness!
Conclusion:
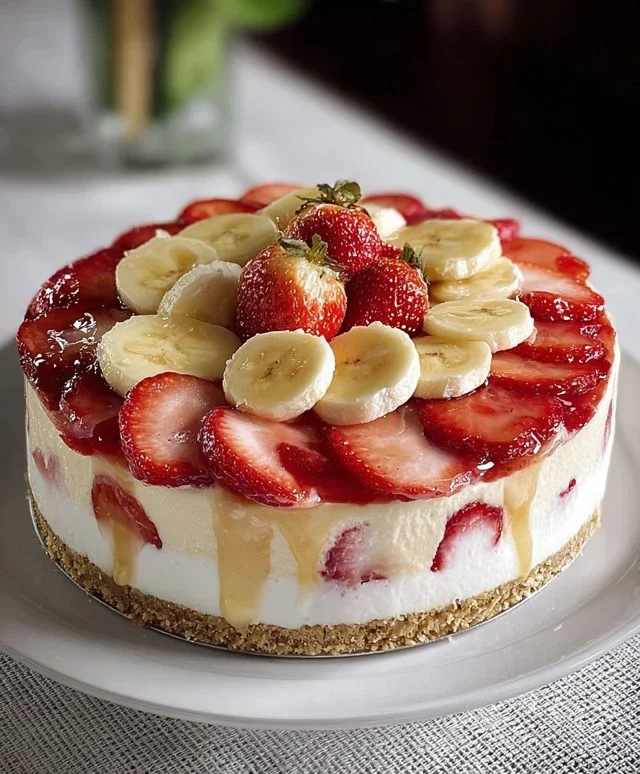
There you have it – the ultimate Strawberry Banana Pudding Cheesecake! This recipe is truly a showstopper, combining the creamy, dreamy decadence of cheesecake with the comforting familiarity of banana pudding and the bright, sweet burst of fresh strawberries. It’s the perfect dessert for celebrations, holidays, or simply when you’re craving something truly special. The textures are incredible: a crisp grabeef ham cracker crust, a rich and smooth cheesecake filling, luscious strawberry topping, and those delightful banana pudding swirls. I’m so excited for you to try this delightful creation!
For serving, I love to top each slice with a dollop of whipped cream and a few extra fresh strawberry slices. It also pairs beautifully with a glass of cold milk or even a scoop of vanilla ice cream. If you’re feeling adventurous, consider adding a sprinkle of crushed Nilla Wafers over the top for an extra layer of classic banana pudding flavor. This Strawberry Banana Pudding Cheesecake is a crowd-pleaser that’s surprisingly approachable to make, and the results are absolutely worth it. Don’t hesitate to give it a go!
Frequently Asked Questions:
Can I make this cheesecake ahead of time?
Absolutely! This Strawberry Banana Pudding Cheesecake is actually best made the day before you plan to serve it. This allows the flavors to meld beautifully and the cheesecake to set up perfectly in the refrigerator. Just cover it tightly with plastic wrap once it’s completely cooled.
What if I don’t have fresh strawberries?
No problem at all! You can easily substitute fresh strawberries with about 2 cups of thawed frozen strawberries. Drain them well before using. Alternatively, a good quality strawberry topping or jam can also be used for that sweet fruitiness.
Are there any dairy-free or vegan modifications?
While this recipe is inherently dairy-heavy, with some ingredient swaps, you could adapt it. For the cheesecake filling, you’d need to experiment with dairy-free cream cheese alternatives and potentially vegan egg substitutes. The crust could be made with vegan butter. The whipped cream topping can also be made using coconut cream. It would require some testing to get the texture just right, but it’s certainly possible!
Strawberry Banana Pudding Cheesecake
A delightful fusion of creamy cheesecake, sweet banana pudding, and fresh strawberries with a crunchy vanilla wafer crust.
Ingredients
-
2 cups crushed vanilla wafers
-
1/4 cup granulated sugar
-
1/2 cup unsalted butter, melted
-
2 (8 oz) blocks cream cheese, softened
-
1/2 cup granulated sugar
-
2 large eggs
-
1 tsp vanilla extract
-
1 cup mashed ripe bananas (about 2 bananas)
-
1/2 cup sour cream
-
1 box (3.4 oz) banana pudding mix
-
1/2 cup heavy cream
-
1 cup fresh strawberries, diced
-
1/4 cup granulated sugar
-
1 tbsp lemon juice
-
1 tsp cornstarch mixed with 1 tbsp water (slurry)
Instructions
-
Step 1
Preheat oven to 350°F (175°C). In a bowl, combine crushed vanilla wafers, 1/4 cup granulated sugar, and melted butter. Press firmly into the bottom of a 9-inch springform pan. -
Step 2
In a large bowl, beat softened cream cheese and 1/2 cup granulated sugar until smooth. Beat in eggs one at a time, then stir in vanilla extract. -
Step 3
In a separate bowl, whisk together mashed bananas, sour cream, and banana pudding mix until well combined. Gently fold this mixture into the cream cheese mixture. -
Step 4
Pour the cream cheese and banana mixture over the prepared crust. Bake for 45-55 minutes, or until the center is almost set. -
Step 5
While the cheesecake bakes, prepare the strawberry topping: In a small saucepan, combine diced strawberries, 1/4 cup granulated sugar, and lemon juice. Bring to a simmer over medium heat, stirring occasionally. Stir in the cornstarch slurry and cook for 1-2 minutes until thickened. -
Step 6
Remove cheesecake from oven and let cool on a wire rack for 10 minutes. Pour the strawberry topping over the warm cheesecake. Refrigerate for at least 4 hours, or until firm. Serve chilled.
Important Information
Nutrition Facts (Per Serving)
It is important to consider this information as approximate and not to use it as definitive health advice.
Allergy Information
Please check ingredients for potential allergens and consult a health professional if in doubt.